Your Halloween candy tractor beams are here.
Halloween is around the corner, and that means it's time to wear costumes and collect loot! If you're planning to go trick or treating, you'll need a bag for all of the candy, comic books, and toys you'll be getting. You might even need small favor bags for a spooky party. And guess what? You can make your bags more galactic by adding Star Wars. I have four different Star Wars trick or treat bag projects that you can make in an afternoon. Put on your favorite Star Wars film in the background, grab your scissors (and an adult if you're a youngling), and have fun!
You'll notice I use silhouettes and symbols in all of these projects. You can find them on Wookieepedia and through Google searches. I purchased all other supplies at Pat Catan's, but they should be available at your local craft store. Gather all your supplies for whichever project you choose before diving in.
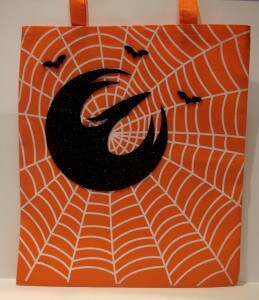
Star Wars Rebels Spider Web Bag
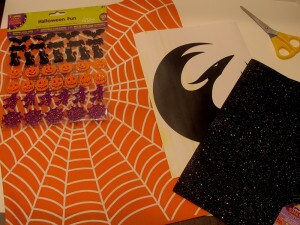
Supplies
Phoenix symbol, 8” wide
Spider web tote bag from Oriental Trading
1 sheet sticky back craft foam in the color of your choice, I used black glitter
Foamie glitter Halloween stickers
Pen
Scissors or X-acto knife and cutting mat
Masking tape
We'll start with the easiest project. Cut out the Phoenix symbol with scissors or a X-acto knife, tape it to the back of the sticky back craft foam (make sure put it front-side down, otherwise it will be backwards when you cut it out), and trace the outline.
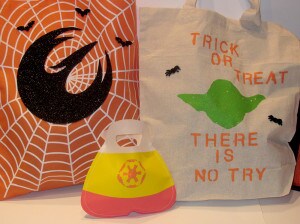
Cut the symbol out of the craft foam and decide where you want to place it on the bag. When you have the perfect spot, lift up the points and make small dots with your pen. Then peel off the backing of the craft foam, line it up, and stick it right to the bag. Press down hard so the craft foam will adhere to the bag. Finally, add as many Foamie Halloween stickers as you'd like for the finishing touch.
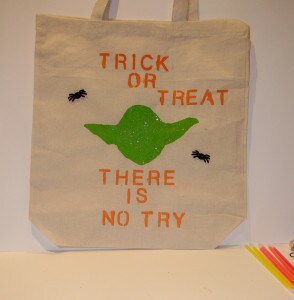
Yoda Trick or Treat Bag
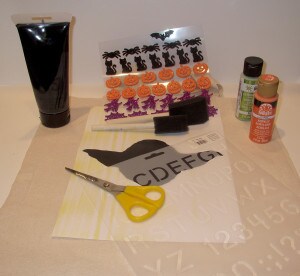
Supplies
Yoda silhouette, 8” wide
Cotton tote bag
1” alphabet stencils
Acrylic paint in the following colors: orange, lime, peridot with glitter
2 sheets card stock
Foamie glitter Halloween stickers
Pen
Pencil
Scissors or X-acto knife and cutting mat
Foam brushes
Masking tape
Ruler
Cut out the Yoda symbol, tape it onto card stock, and trace his little pointy-eared head. Take the card stock with the outline and cut around it so that you have a nice Yoda-shaped hole to use as your stencil.
Use the ruler to measure and find the middle of your bag and add a small dot to mark it. This is also a good time to plan where you want the words to go (I didn't do that, but you should). Use a pencil and ruler and draw light lines to mark the bottom of each line of text. When that's done, place your Yoda stencil and tape it down. Insert a sheet of card stock into the bag so the paint doesn't bleed through to the other side. Mix the lime green and peridot with glitter paints, and stipple the paint on to fill in the Yoda stencil. Don't lay the paint on too thickly. When you're done, carefully remove the stencil. Set the bag aside and let the paint dry.
Once Yoda is completely dry, you can add any text you wish. Simply use the stencils and stipple orange paint onto the relevant letters. Embellish the bag with Foamie glitter Halloween stickers. I went with spiders.
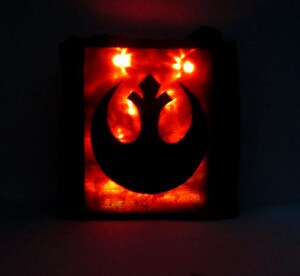
Glow in the Dark Rebel Alliance Bag
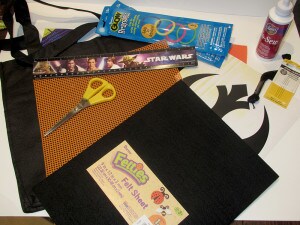
Supplies
Rebel Alliance symbol, 8” wide
Black tote bag, 12.5” x 22”
1 sheet orange felt
2 sheets black stiffened felt
1 12” x 12” sheet orange plastic canvas
Ruler
Pen
Silver or white pen
Fabric glue
Scissors or X-acto knife and cutting mat
Black embroidery floss
Needle
Glow bracelets
Optional: light-up pumpkin necklace
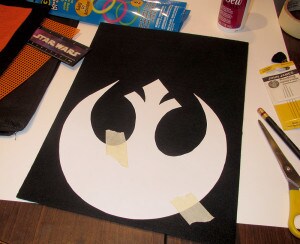
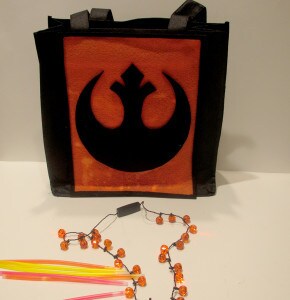
Cut out the Rebel Alliance symbol and tape it to one sheet of the black stiffened felt. Trace it using a silver or white pen and cut it out.
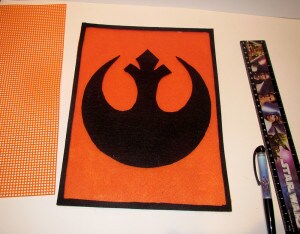
Take the second sheet of black stiffened felt and measure a .25” border with your ruler. Mark the border with your silver or white pen. Carefully cut out the interior of the felt so you're left with a thin border. Line the back of the border with fabric glue, and glue the border onto the piece of orange felt. Let the glue dry and trim any excess orange felt. Then, glue the stiffened felt Rebel Alliance symbol onto the orange felt in the center of the frame. Set it aside and let the glue dry.
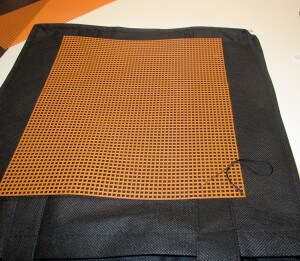
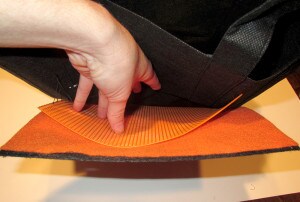
Next, cut the orange plastic canvas down to be 1” smaller than the size of your framed felt piece. We need to make a pocket to hold the glow sticks (you could also use felt instead of plastic canvas). Once the plastic canvas is the right size, pin it to the front of the black tote bag and sew it into place. I used two strands of embroidery floss. If you want to sew channels to hold the glow bracelets in place, this is the time to do that. You'll need spots for six glow bracelets. Remove the pins and then glue the edges of your framed felt symbol right to the black tote bag. Press it into place and set the bag aside to let it dry completely. Treat yourself to some blue milk while you wait.
When you're ready to go trick or treating, bend the glow bracelets to activate them and put them in the front pocket. I added a cheap light-up pumpkin necklace to get more of a glow effect; you could also use battery operated tealight candles.
Imperial Candy Corn Bag
Supplies
Imperial symbol, 2.5” x 2.5”
Candy corn bag by Darice (like this one)
Sheet of card stock
Orange acrylic paint
Foam brush
X-acto knife and cutting mat
Masking tape
The hardest part of making this bag is cutting out the Imperial symbol; it has a lot of tiny nooks. Print it out in black and white and cut out all the white parts with a X-acto knife as best as you can.
Put a sheet of card stock inside the bag before you start painting so the paint doesn't bleed through. Then, tape your new Imperial stencil down. Fill in with orange paint using the stippling method. Once you've filled the symbol in, carefully remove the stencil. I sprinkled on gold glitter at this point because I have a glitter problem (hey, at least it's not glitterstim). You can replace the Imperial symbol with any other Star Wars symbol you prefer.
Happy Halloween! Please share photos if you make any of these bags; I'd also love to see pictures of your Star Wars trick or treat bag designs.
Amy Ratcliffe is a writer obsessed with all things Star Wars, Disney, and coffee. You can follow her on Twitter at @amy_geek and keep up with all things geeky at her blog.


