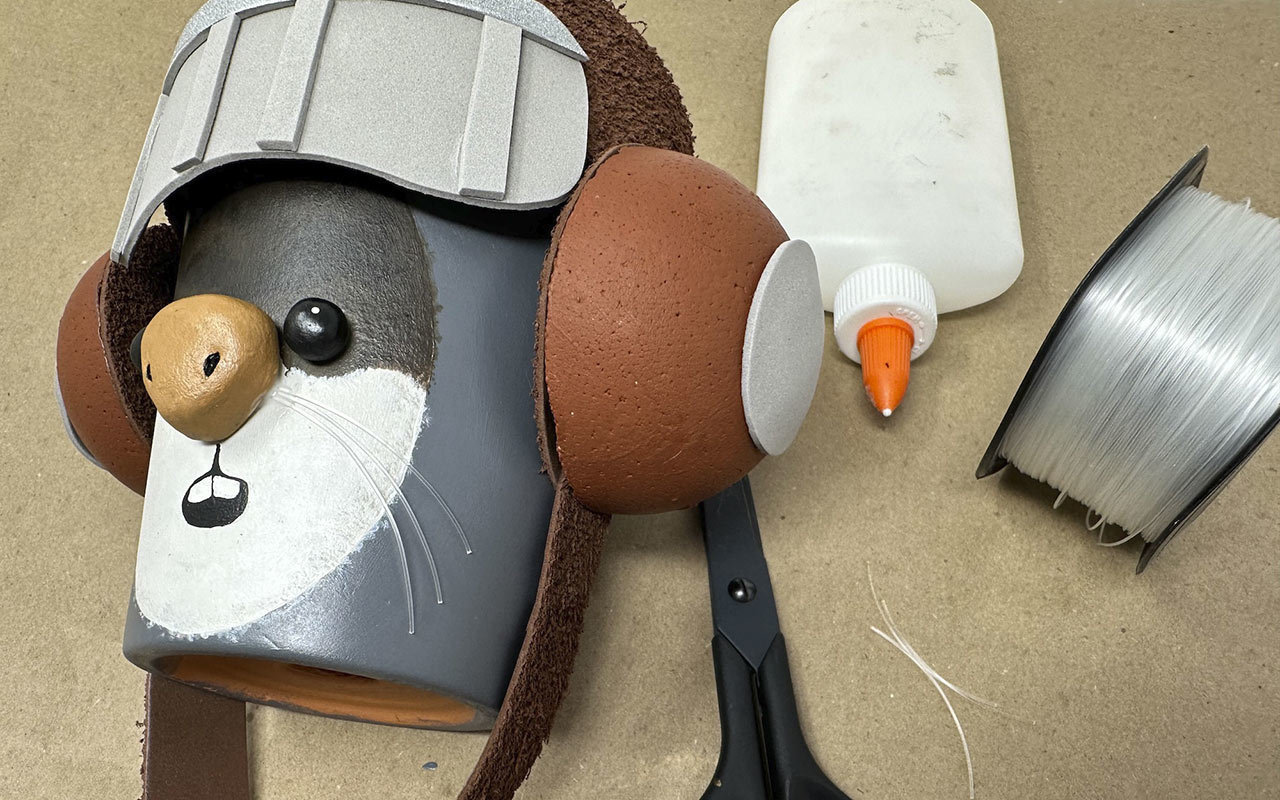
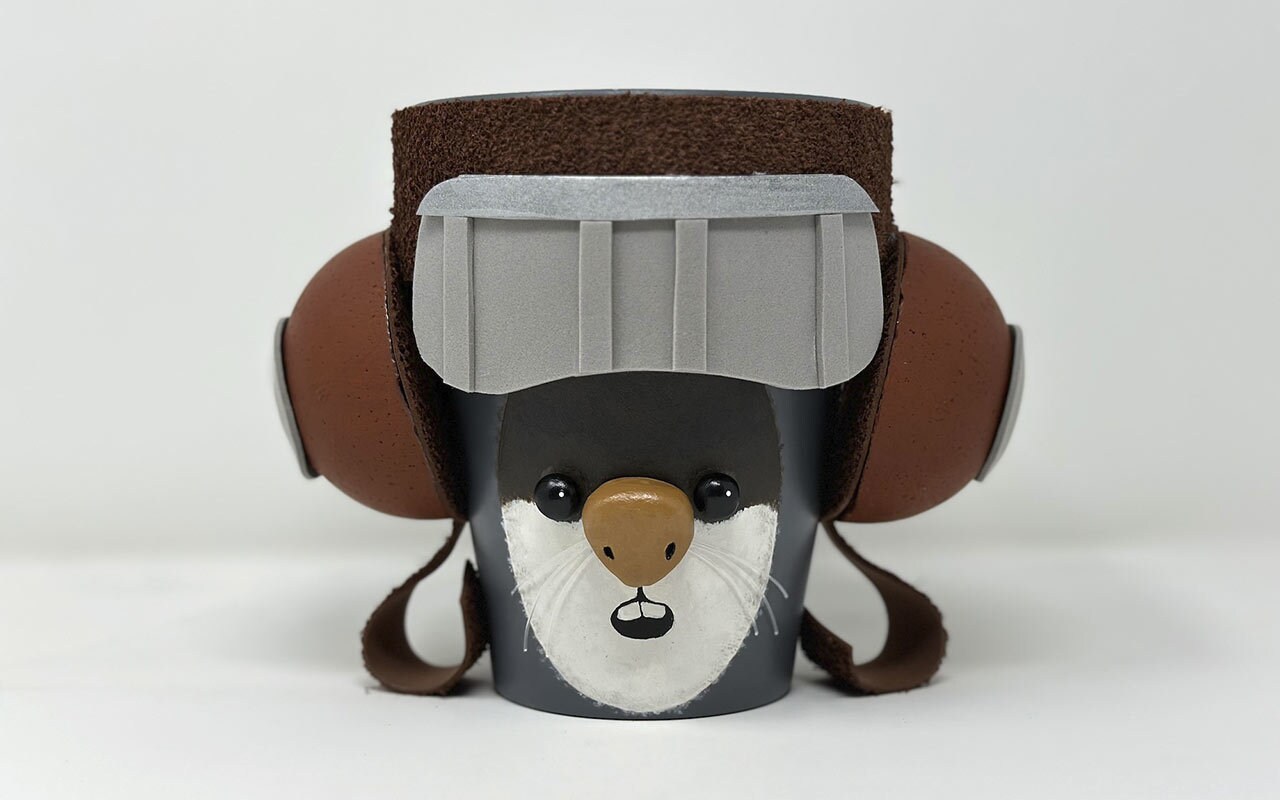
When the Jedi of the High Republic need to find someone fast, they don’t have time to take a break and stretch out with their feelings. Instead, they turn to Bazil! With one sniff of a person’s scent, Bazil can track the target he’s searching for, no matter what dangers lurk around him. (It just might take him a few minutes to make his way there.) Catch Bazil in action in The Acolyte, only on Disney+! While we don’t have a Bazil in our galaxy, we do have something that also smells good: basil.
All
- Andor
- Star Wars Celebration
- Skeleton Crew
- The Mandalorian
- Ahsoka
- The Acolyte
- Obi-Wan Kenobi
- The Book of Boba Fett
- The Bad Batch
- The Clone Wars
- Visions
- Behind the Scenes
- Books + Comics
- Characters + Histories
- Collecting
- Creativity
- Disney Parks
- Disney+
- Events
- Fans + Community
- Films
- Games + Apps
- ILM
- Interviews
- LEGO Star Wars
- Lucasfilm
- Merchandise
- Opinions
- Quizzes + Polls
- Recipes
- Rogue One
- Solo
- Star Wars Day
- Star Wars Rebels
- Series
- The High Republic

You’ll Dig This DIY Bazil Basil Planter
Help your new favorite character in The Acolyte put down roots.
No need to track down directions for how to make this plucky planter – we’ve got you covered with the how-to below.
What You’ll Need
Scissors
4” clay pot
Masking tape
Pencil
Dark gray acrylic paint
Air-dry clay
Toothpick
Small bowl of water
Paint brush
1 sheet of gray craft foam
School glue
Silver acrylic paint
Dark brown paint
White acrylic paint
2.8” Styrofoam ball
Foam cutter (knife or hot wire)
Brown acrylic paint
Hot glue gun
1 sheet of brown textured craft foam
Black acrylic paint
Tan acrylic paint
Thin paint brush
Clear acrylic sealer (spray paint)
Fishing line
Small basil plant
Get Started!
The activities in this article should only be done with adult supervision.

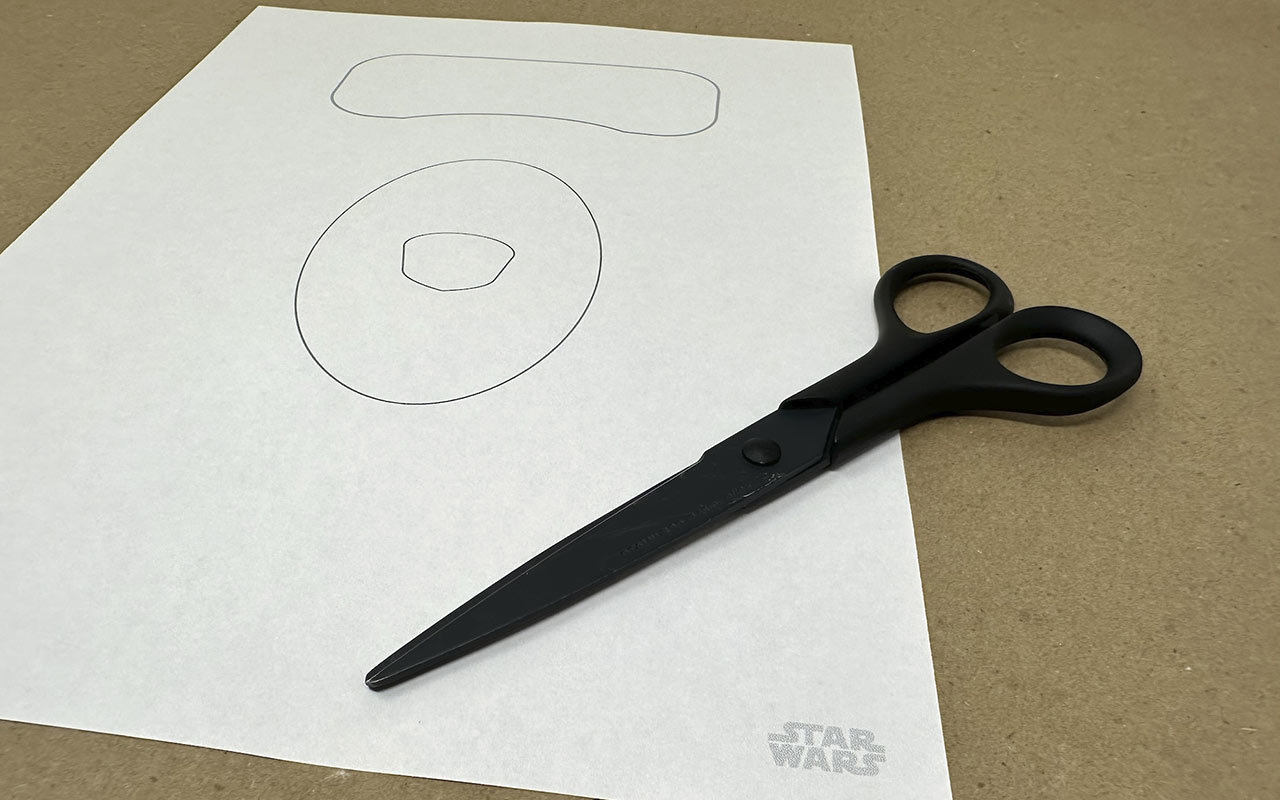
Step 1: Print the Bazil template and cut out the two large shapes.

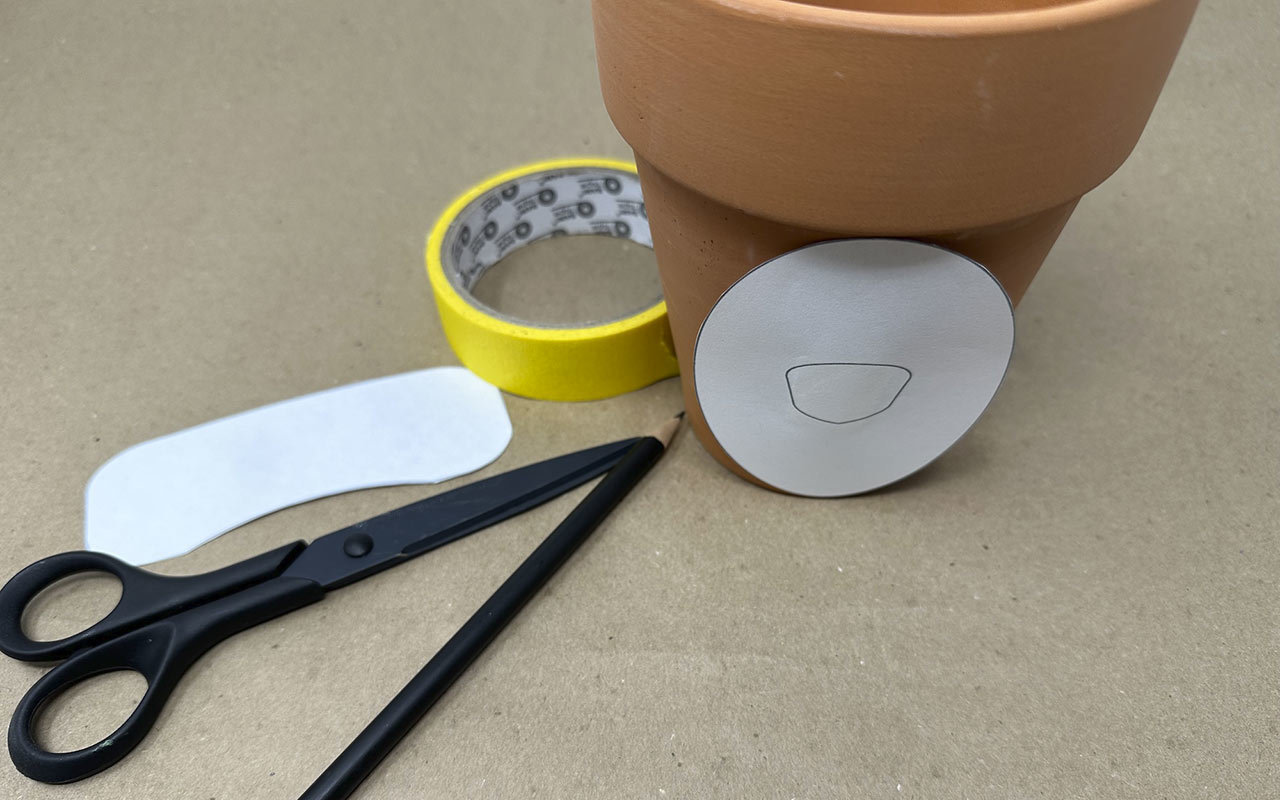
Step 2: Use the masking tape to stick the oval shape to the 4” clay pot. Trace it with a pencil. Remove the stencil and stick it to your work surface.

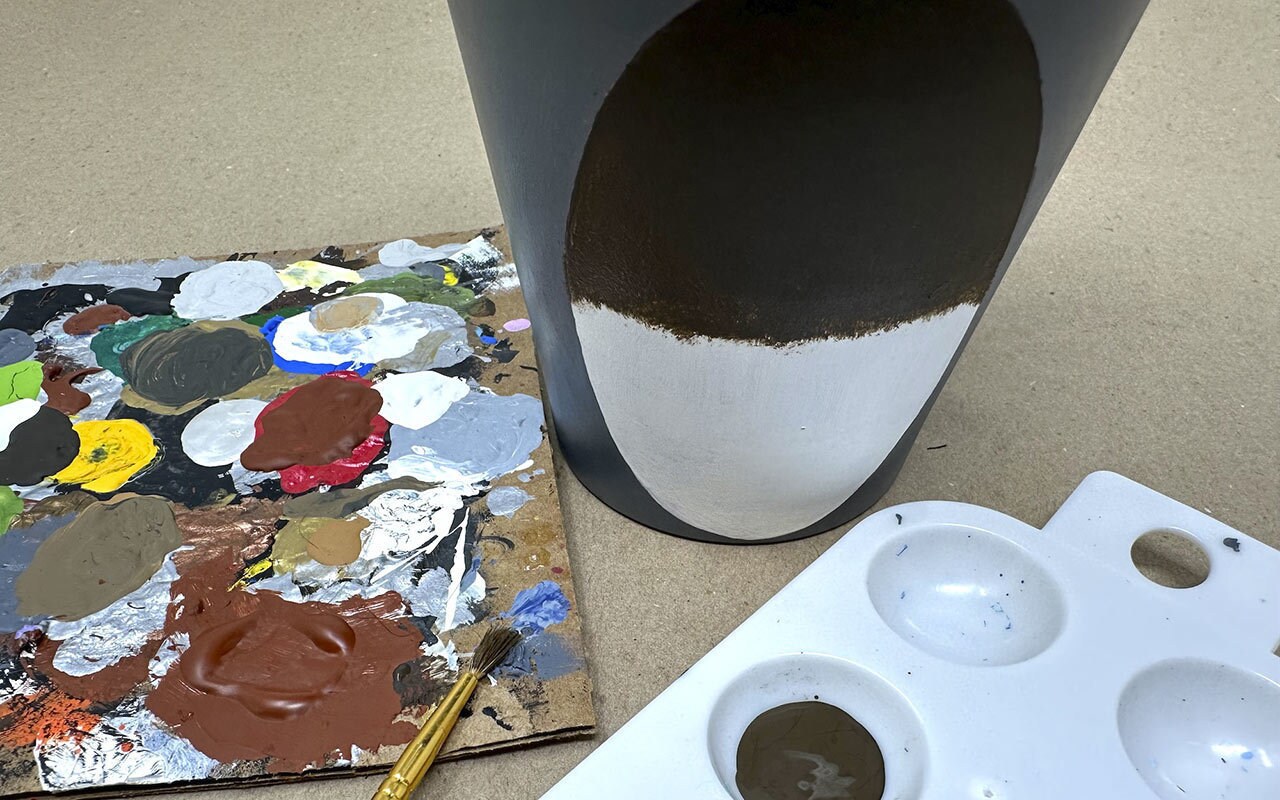
Step 3: Paint the entire clay pot with the dark gray paint, except for the inside of the oval you just traced. Set aside to dry.
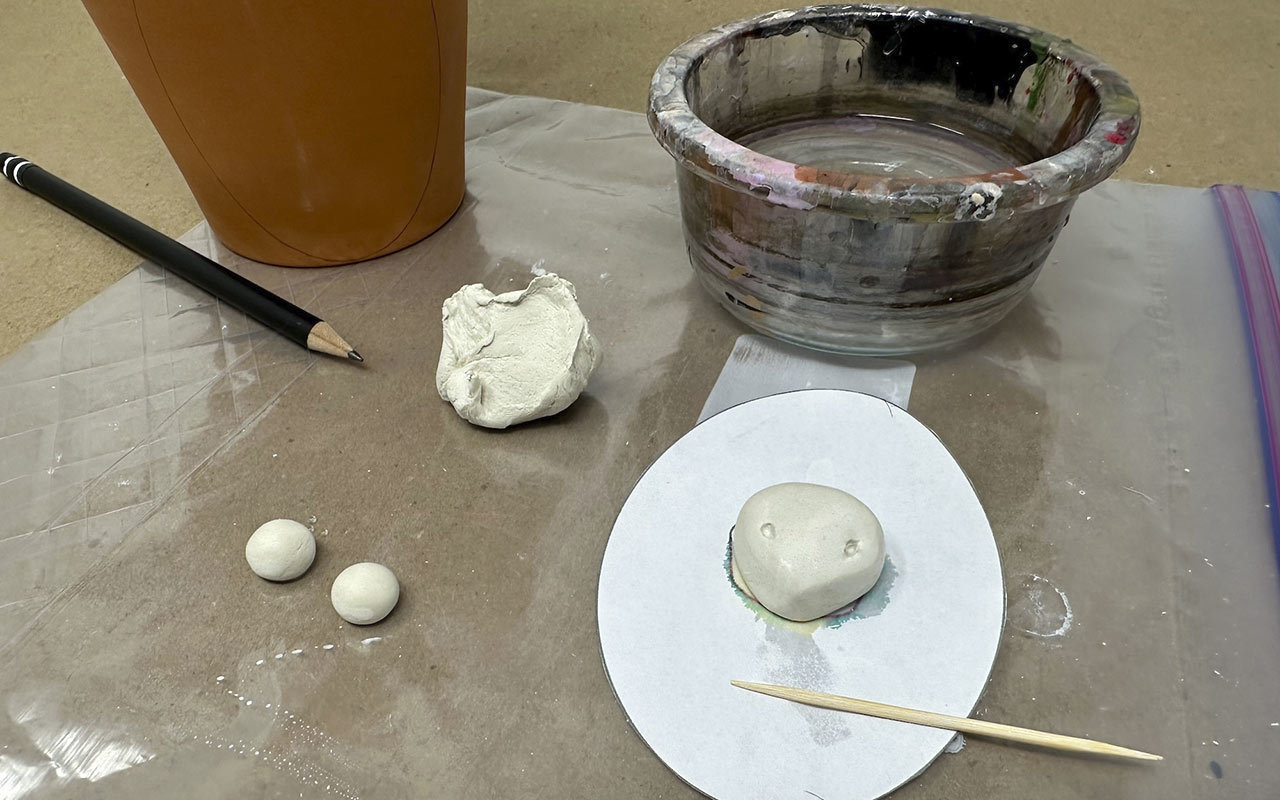
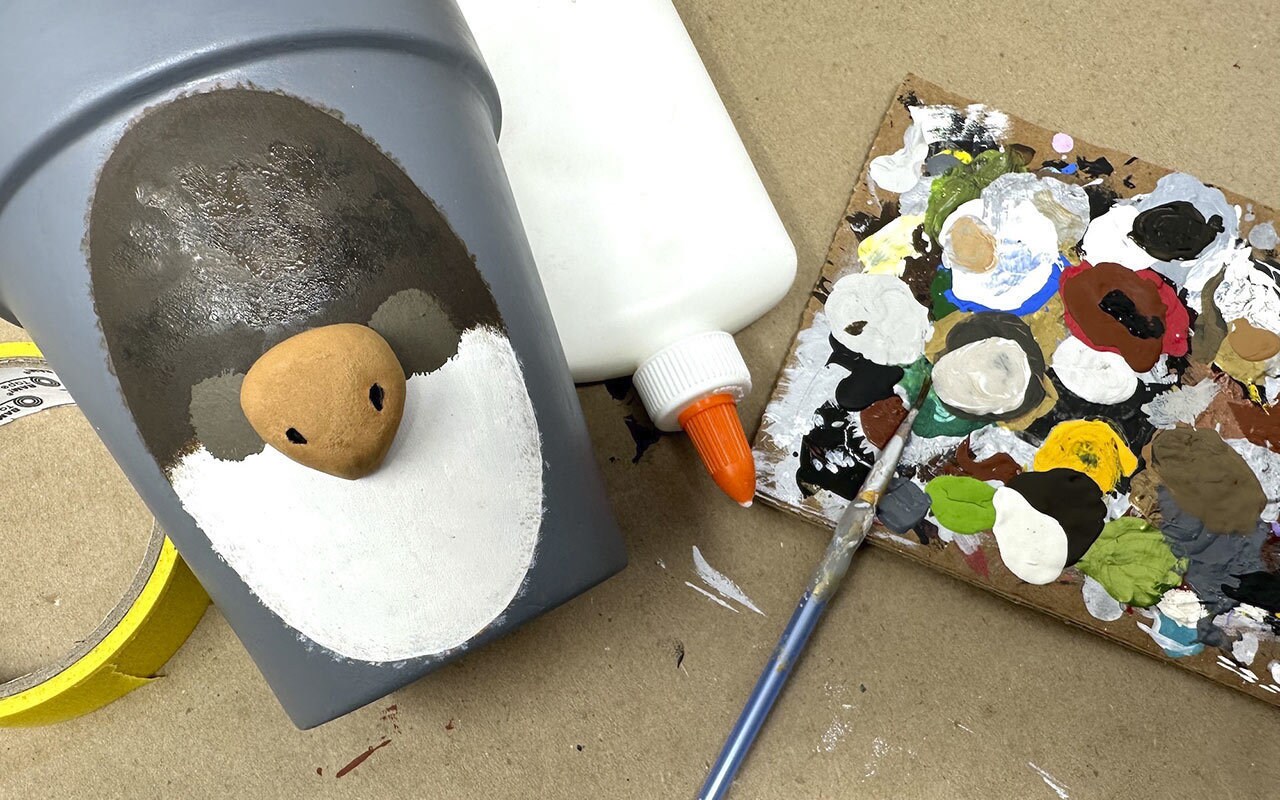
Step 4: Next, use the air-dry clay to sculpt Bazil’s nose. You can use the nose shape on the template as a size guide. Dip a toothpick into a small bowl of water and use it to press two holes on either side of the nose.
Tip: Dip your finger in the water and lightly smooth over the clay to remove fingerprints.
Step 5: Roll two pea-sized pieces of air-dry clay for Bazil’s eyes. Gently press them into the top of your workspace to lightly flatten one side. Set aside the clay eyes and nose to dry, preferably overnight.

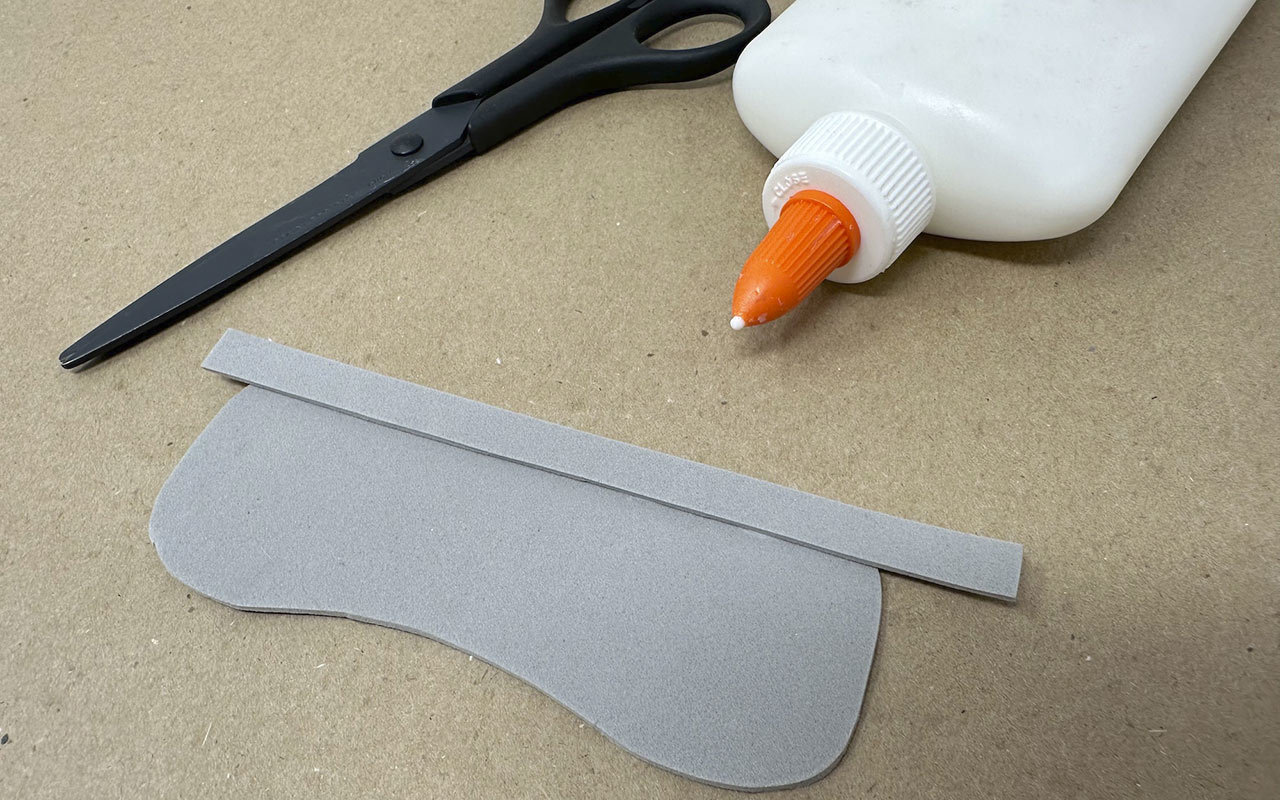
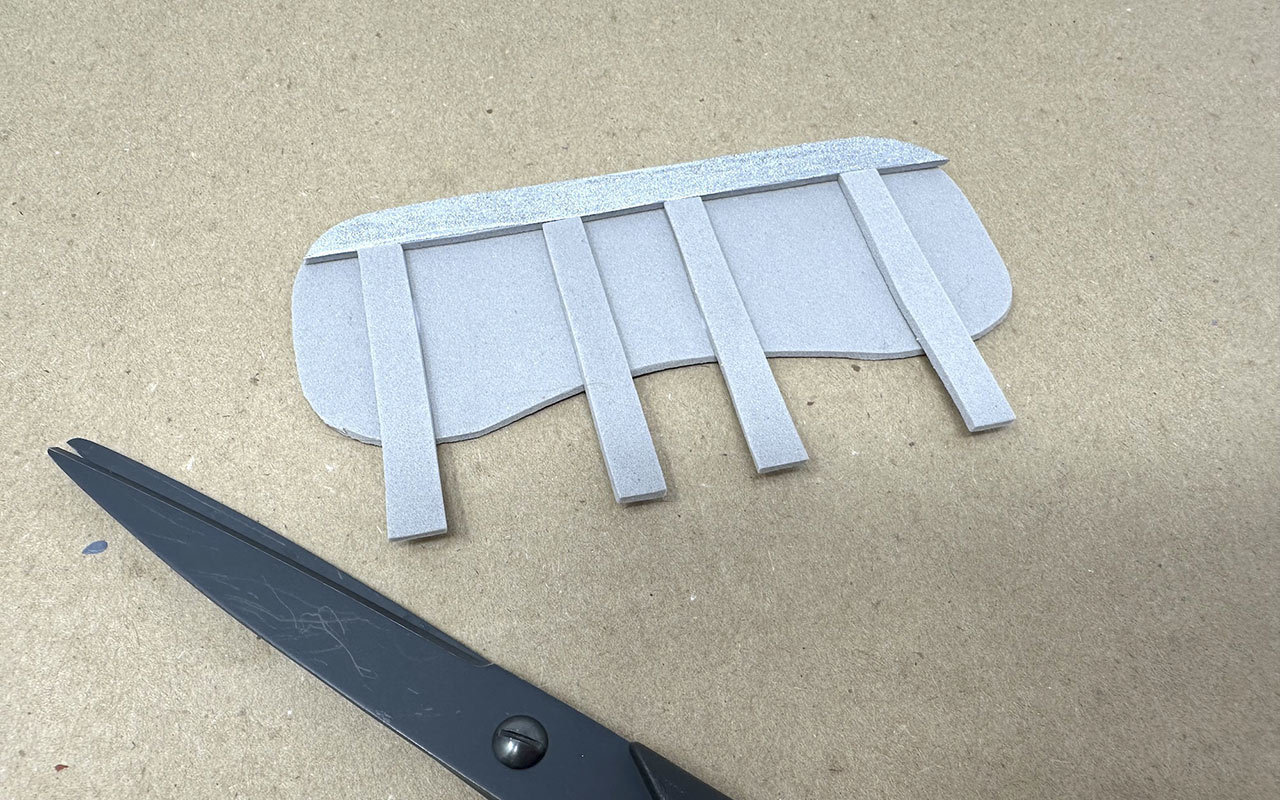
Step 6: Use the pencil to trace the visor template on the gray craft foam. Cut it out with scissors.

Step 7: Cut a strip of gray craft foam about 0.25” wide and 6” long. Use the school glue to glue it along the top edge of the visor. Let dry, then trim the edges. Paint the strip silver and let dry.

Step 8: Cut four small strips from the gray craft foam about 0.25” wide and 4” long. Glue them vertically on the goggles below the top strip. Let the glue dry, then trim the edges.

Step 9: Once the clay pot is dry, paint the bottom half of the oval with the white acrylic paint. Paint the top half with the dark brown acrylic paint. Let dry.
Step 10: Use a foam cutting knife or hot wire tool to cut a 2.8” Styrofoam ball in half. These will be Bazil’s ear coverings.
Note: If you’re using a hot wire cutter for foam, make sure the room is well-ventilated and take all safety precautions.
Step 11: Paint the two halves of the Styrofoam ball with the brown acrylic paint. Let dry.

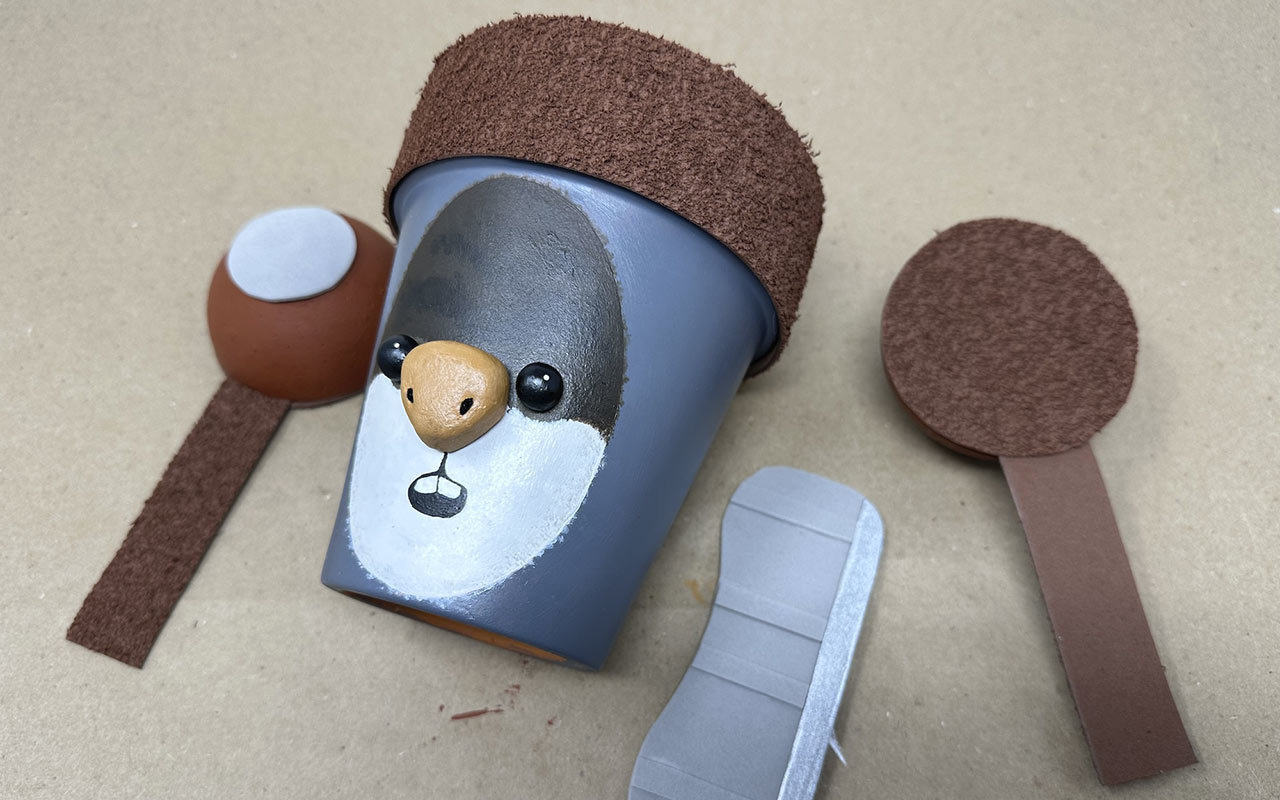
Step 12: Draw two circles on the gray craft foam about 1.5” in diameter. Cut them out with scissors, then use the hot glue gun to attach them to the center of each domed half of the Styrofoam.
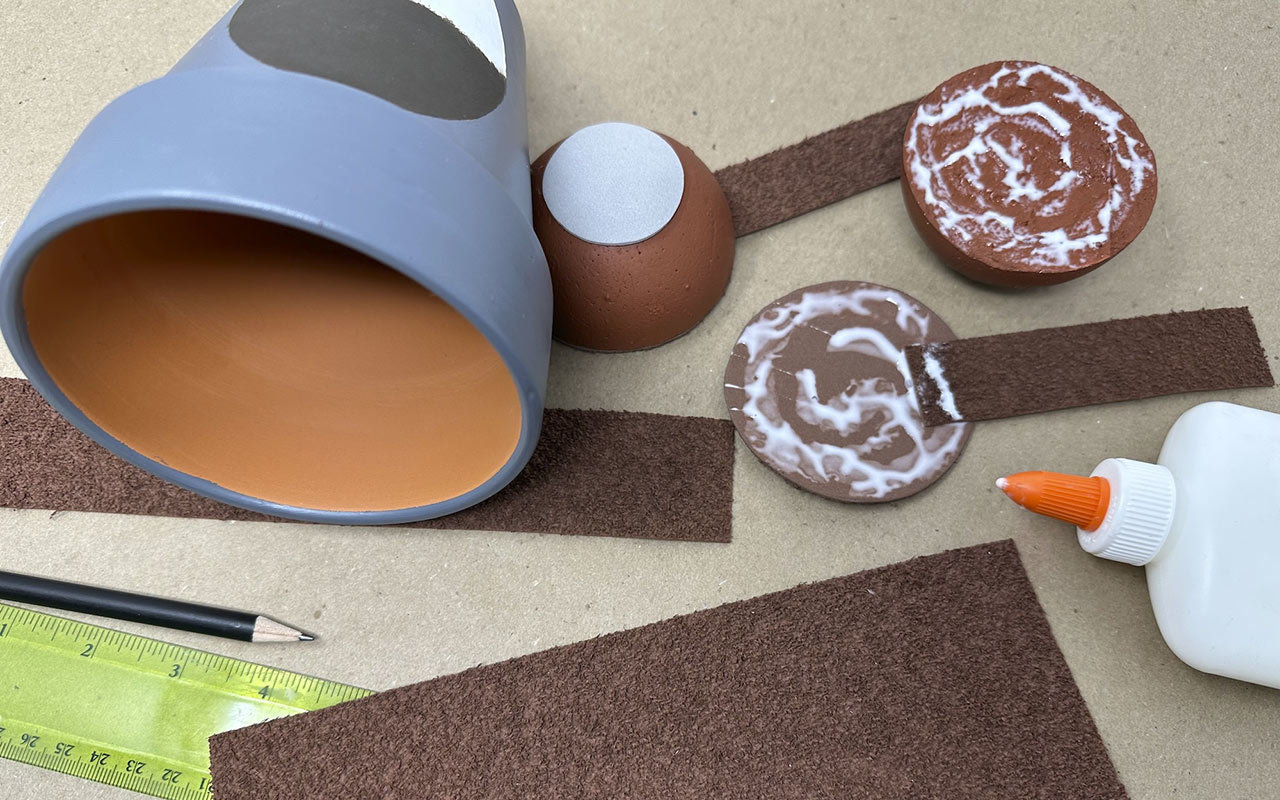
Step 13: Trace one ear covering on the smooth side of the brown textured craft foam. Cut it out, and repeat. Cut two strips of the textured craft foam, each about 1” wide and 4” long.
Step 14: Spread school glue across the smooth side of one circle you cut out. Glue the top edge of one 4” strip, smooth side to smooth side, then add glue on top of the textured side of the strip. Glue it to the flat side of one Styrofoam half.

Step 15: Repeat Step 14 on the other Styrofoam half.

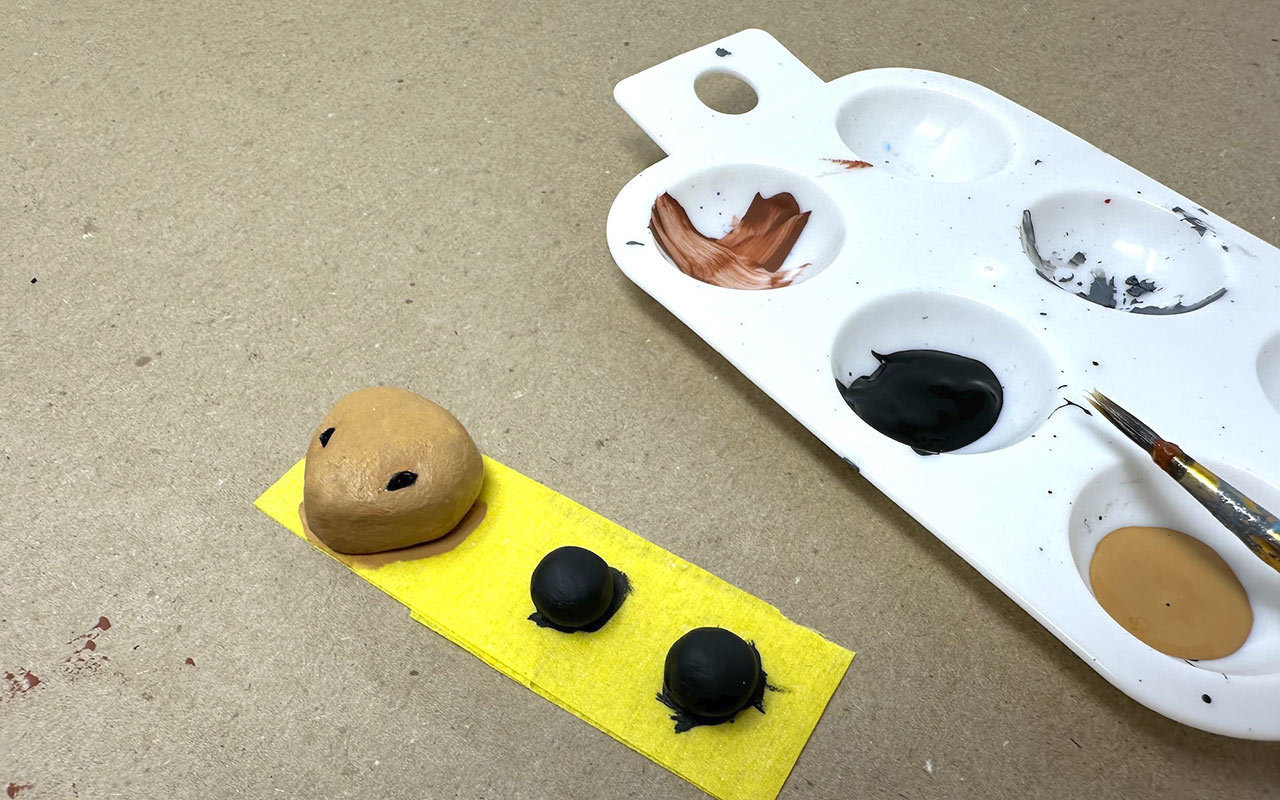
Step 16: Next, use the black acrylic paint to paint the nostrils of Bazil’s nose and his two eyes. Let dry. Use the end of a paint brush to add two white dots on the eyes as reflections. Next, paint his nose with the tan acrylic paint and let dry.
Tip: Use a rolled-up piece of masking tape to hold the small clay parts while you paint.
Step 17: Use the school glue to stick the nose in the center of Bazil’s face.
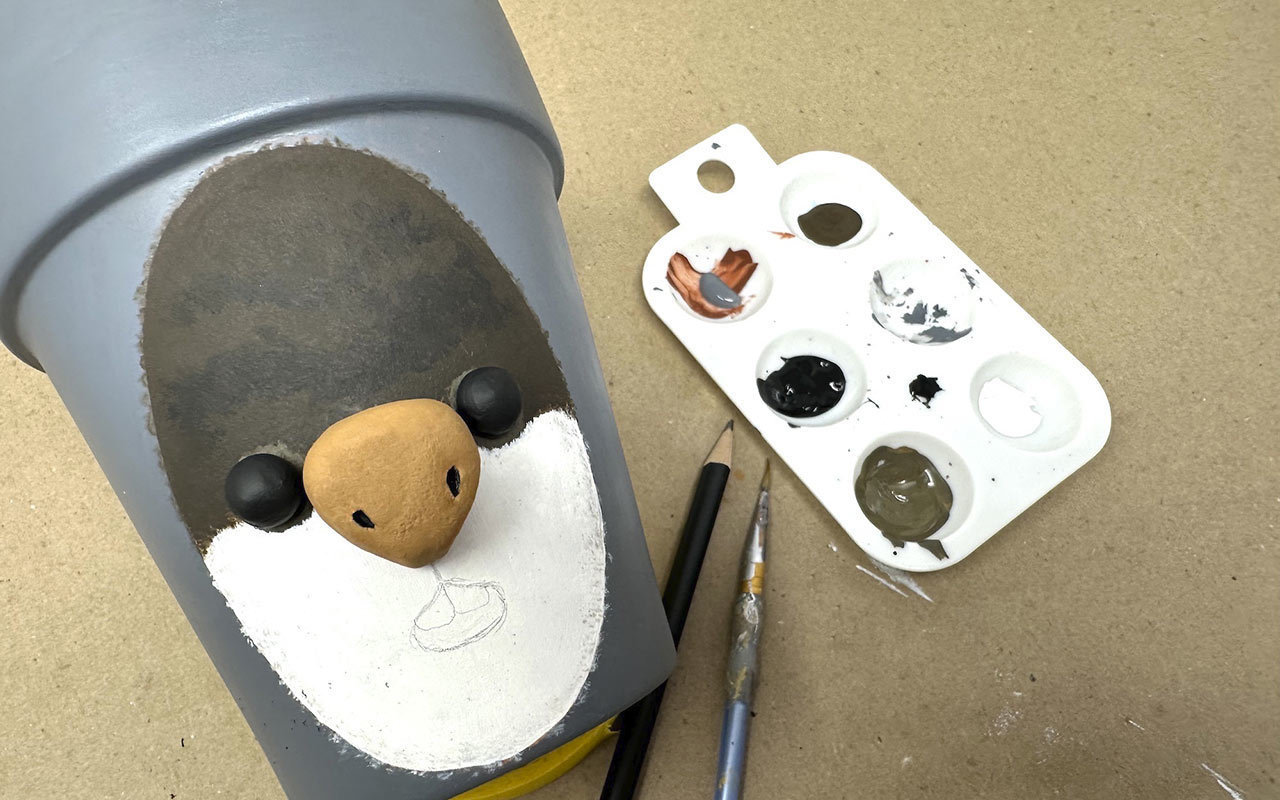
Step 18: Mix a little black paint into the tan paint. Dab the paint brush with the new shade to make two small circles where Bazil’s eyes will be. Let dry.

Step 19: Use the darker shade you mixed to add shadows and more color to the top half of Bazil’s face. You can also mix white into it to add shadows to the sides of his face. Finally, dab the paint brush along the oval edge to make as much fur texture as you’d like with the dark brown and white paint. Let all paint dry.
Step 20: Use the school glue to stick Bazil’s eyes in place. Let dry.
Step 21: Use the pencil to lightly draw the mouth and teeth below the nose. Use a thin detail paint brush to trace the pencil lines and finish Bazil’s mouth. Let dry.

Step 22: Take the painted pot outside and spray it completely with the clear acrylic sealer. Let dry completely.
Step 23: Cut one strip of the textured craft foam 12” long and 1.5” inches wide (or the width of the rim of the clay pot).
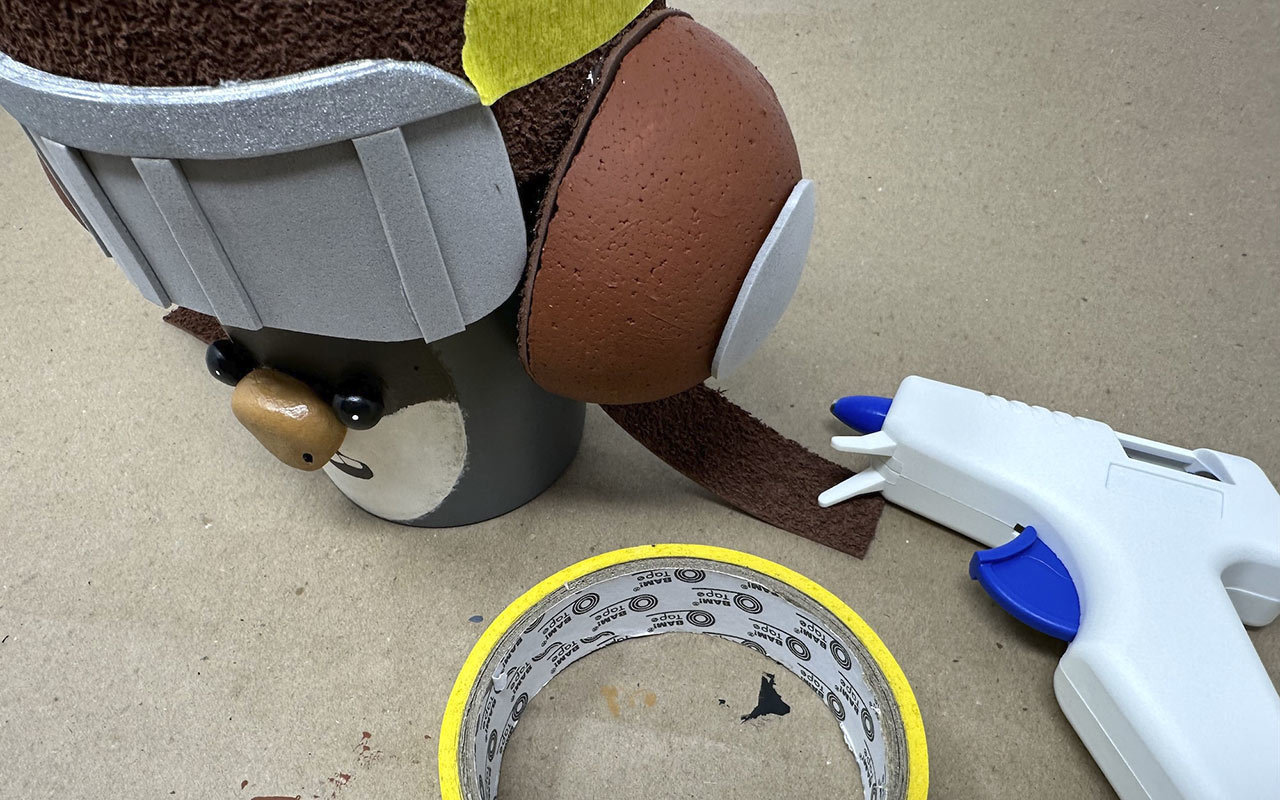
Step 24: Center the 12” long textured brown craft foam strip above Bazil’s head and hot glue it around the top edge of the pot.

Step 25: Next, hot glue the gray foam visor on the textured craft foam, just above Bazil’s head.
Step 26: Hot glue the two ear coverings on either side of the clay pot, one on each side of the visor, with the strips hanging straight down. Trim them to your desired length.
Tip: Use masking tape to help with spacing for hot gluing the pieces to the pot.

Step 27: Finally, cut six small pieces of fishing line a few inches in length. Press them gently under the sides of Bazil’s nose, then use the school glue to stick them in place. Let dry.

Place your plant inside, and your Bazil Basil is complete! Thanks to Bazil, you’ll never have to look far to find a super fresh ingredient to make dinner.
For more on the making of The Acolyte, discover StarWars.com's full coverage, including:
Visual Effects Supervisor Julian Foddy Talks World-Building The Acolyte
The Acolyte’s Amandla Stenberg on Playing Twins, the Sith, and Star Wars
How The Acolyte Challenges How We See Some Members of the Jedi
The Acolyte’s Manny Jacinto Unmasked
Fight Like a Jedi: Inside The Acolyte’s Stunt Sequences and Martial Arts Action
Inside The Acolyte Creature Shop: Meet Bazil, the Tynnan Tracker
Scoring The Acolyte: Composing for the Jedi, the Witches, and the Many Moods of the Stranger
In The Acolyte, Jodie Turner-Smith’s Mother Aniseya is Mothering
For the Love of The Acolyte’s Jecki Lon and Yord Fandar
The Acolyte’s Charlie Barnett is Here for the Yord Horde
“Whatever You Think The Acolyte Is, It’s Not”: Creator Leslye Headland On Her New Star Wars Series
Kelly Knox is the author of Star Wars Conversation Cards, Be More Obi-Wan, and Star Wars: Dad Jokes, and a co-author of Return of the Jedi: A Visual Archive. Her puns are always intended.
Related Stories
-
June 25, 2024
June 25, 2024
Jun 25
- [object Object] [object Object]
Star Wars Celebration Japan Spotlight: Peach Momoko Paints a Picture of Her Love of Star Wars
April 1, 2025
April 1, 2025
Apr 1
- [object Object] [object Object]
Star Wars Celebration Japan Fan Spotlight: Yuki Shibaura’s Star Wars Art is a Cut Above
March 6, 2025
March 6, 2025
Mar 6
-
February 21, 2025
February 21, 2025
Feb 21
- [object Object] [object Object]
Star Wars Celebration Japan Fan Spotlight: Jessie Co’s Elaborate and Edible Character Creations
February 4, 2025
February 4, 2025
Feb 4
-
October 31, 2024
October 31, 2024
Oct 31
- [object Object] [object Object]
Shrink Your Own Binks With These LEGO Star Wars: Rebuild the Galaxy Charms
September 19, 2024
September 19, 2024
Sep 19