• More More

Search

My Account Logout
  • facebook
  • instagram
  • youtube
  • twitter
  • other
  • NEWS + FEATURES
  • VIDEO
  • FILMS
  • SERIES
  • INTERACTIVE
  • COMMUNITY
  • DATABANK
  • DISNEY+
  • More More
My Account Logout
  • facebook
  • instagram
  • youtube
  • twitter
  • other

ALL OF YOUR STAR WARS FAVORITES NOW STREAMING ON DISNEY+

All

  • Andor
  • Behind the Scenes
  • Books + Comics
  • Characters + Histories
  • Collecting
  • Creativity
  • Disney Parks
  • Disney+
  • Events
  • Fans + Community
  • Films
  • Force For Change
  • Forces of Destiny
  • Galaxy of Adventures
  • Games + Apps
  • ILMxLAB
  • In Pop Culture
  • Interviews
  • LEGO Star Wars
  • Lucasfilm
  • Merchandise
  • Obi-Wan Kenobi
  • Opinions
  • Quizzes + Polls
  • Recipes
  • Rogue One
  • Solo
  • Star Wars Celebration
  • Star Wars Day
  • Star Wars Rebels
  • Star Wars Resistance
  • Television
  • The Bad Batch
  • The Book of Boba Fett
  • The Clone Wars
  • The Force Awakens
  • The High Republic
  • The Last Jedi
  • The Mandalorian
  • The Rise of Skywalker
  • The Star Wars Show
  • Visions

Dive Into Halloween with a Dianoga-It-Yourself Pumpkin

October 4, 2021
October 4, 2021
Kelly Knox

What an incredible craft you’ve discovered!

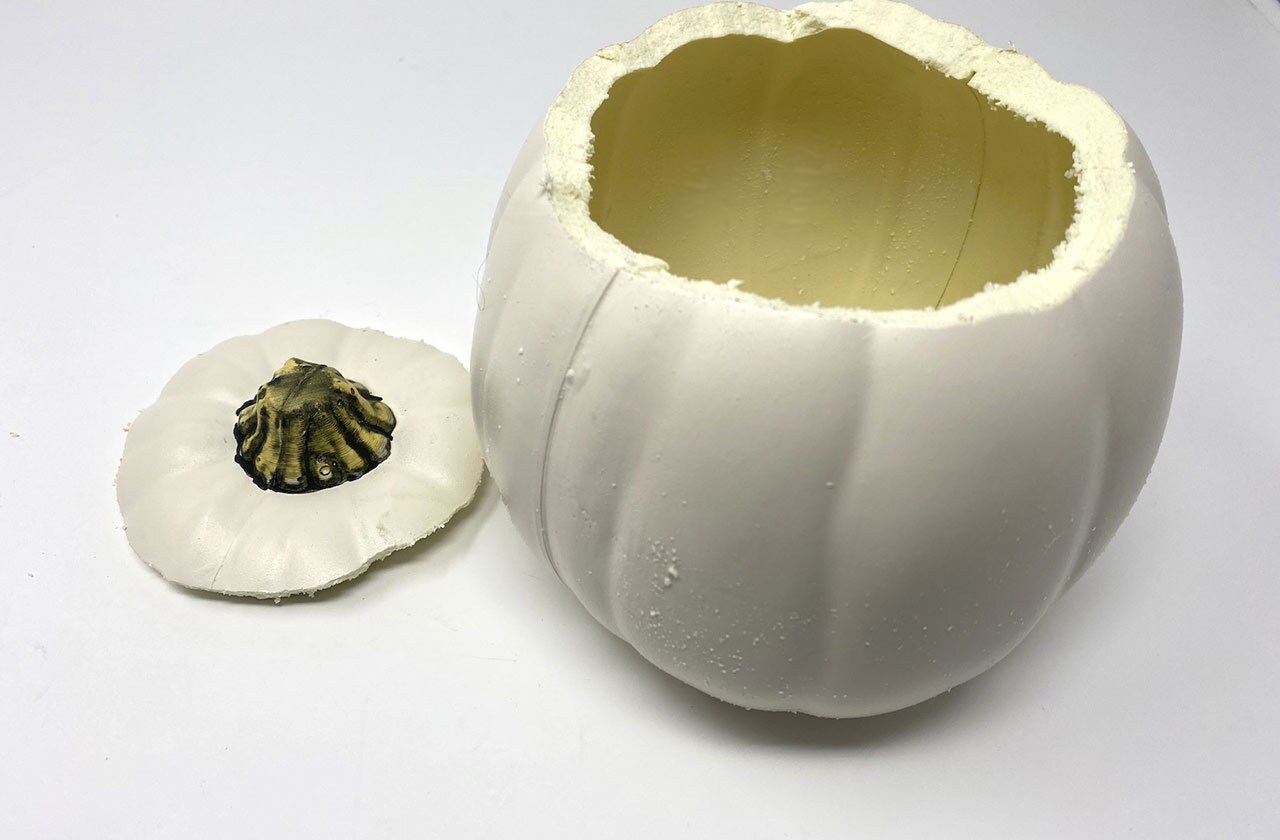
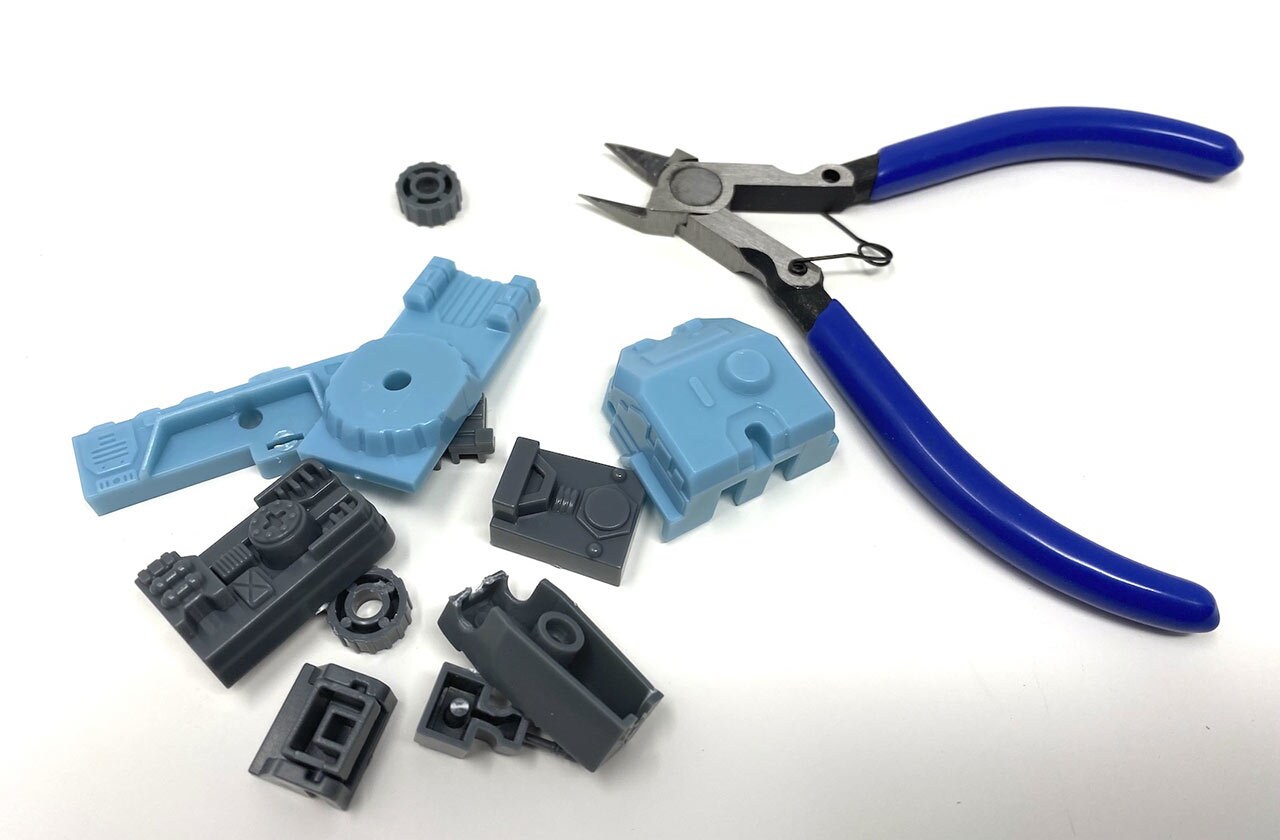
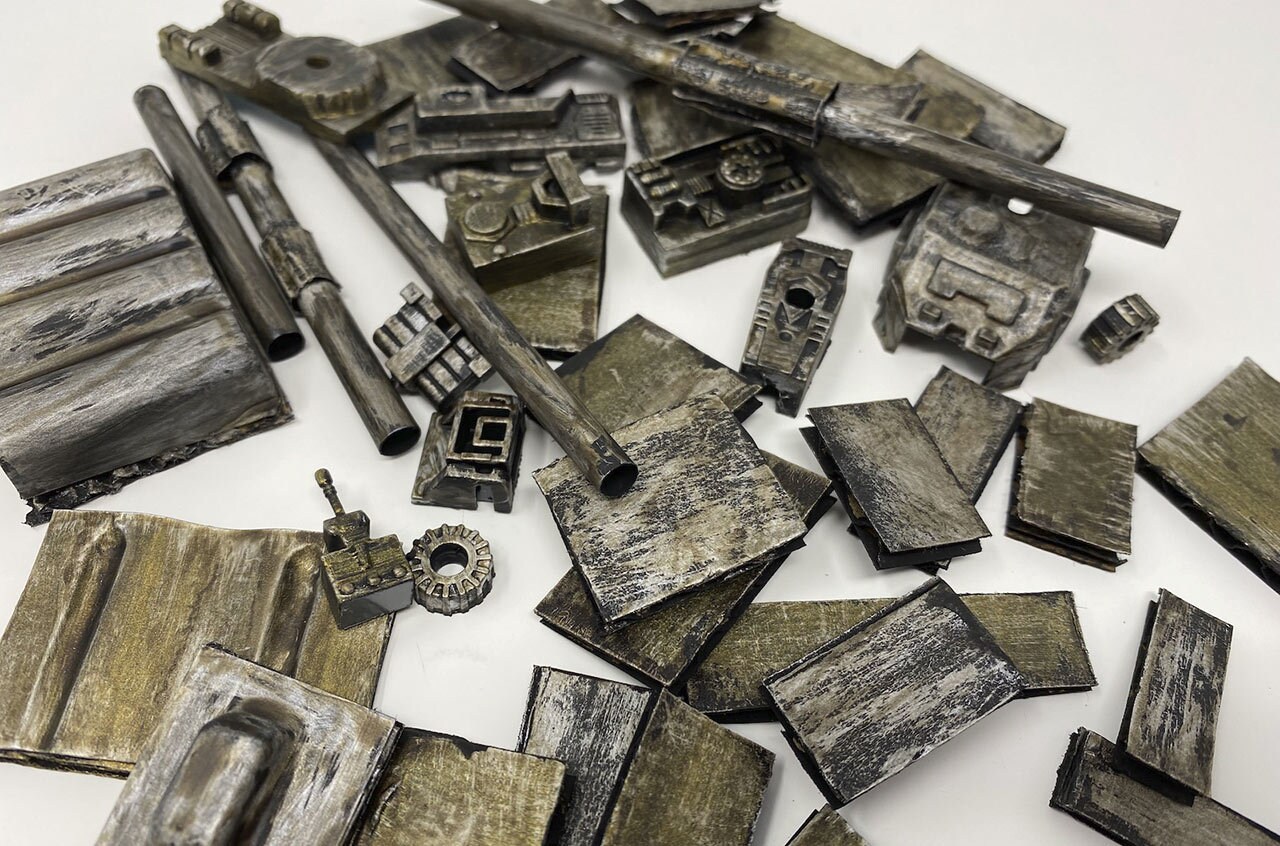
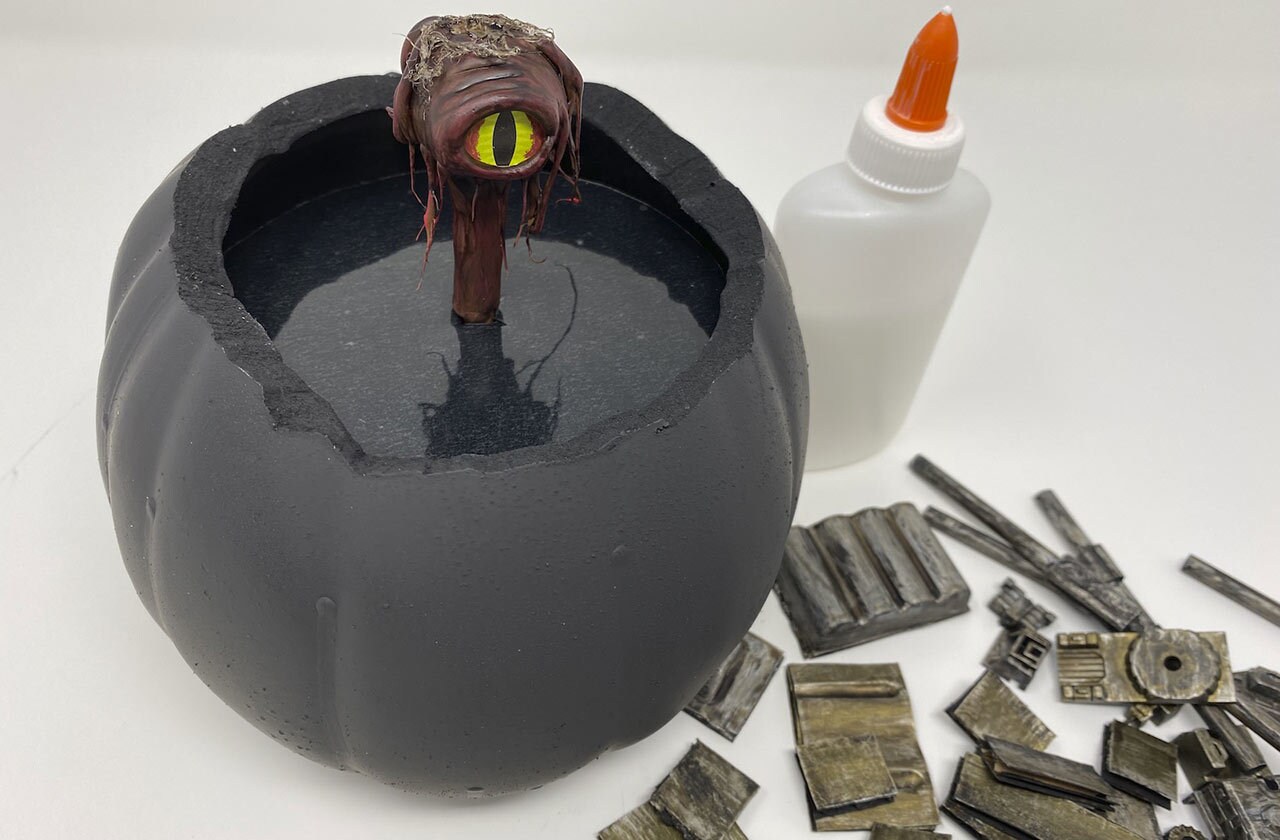
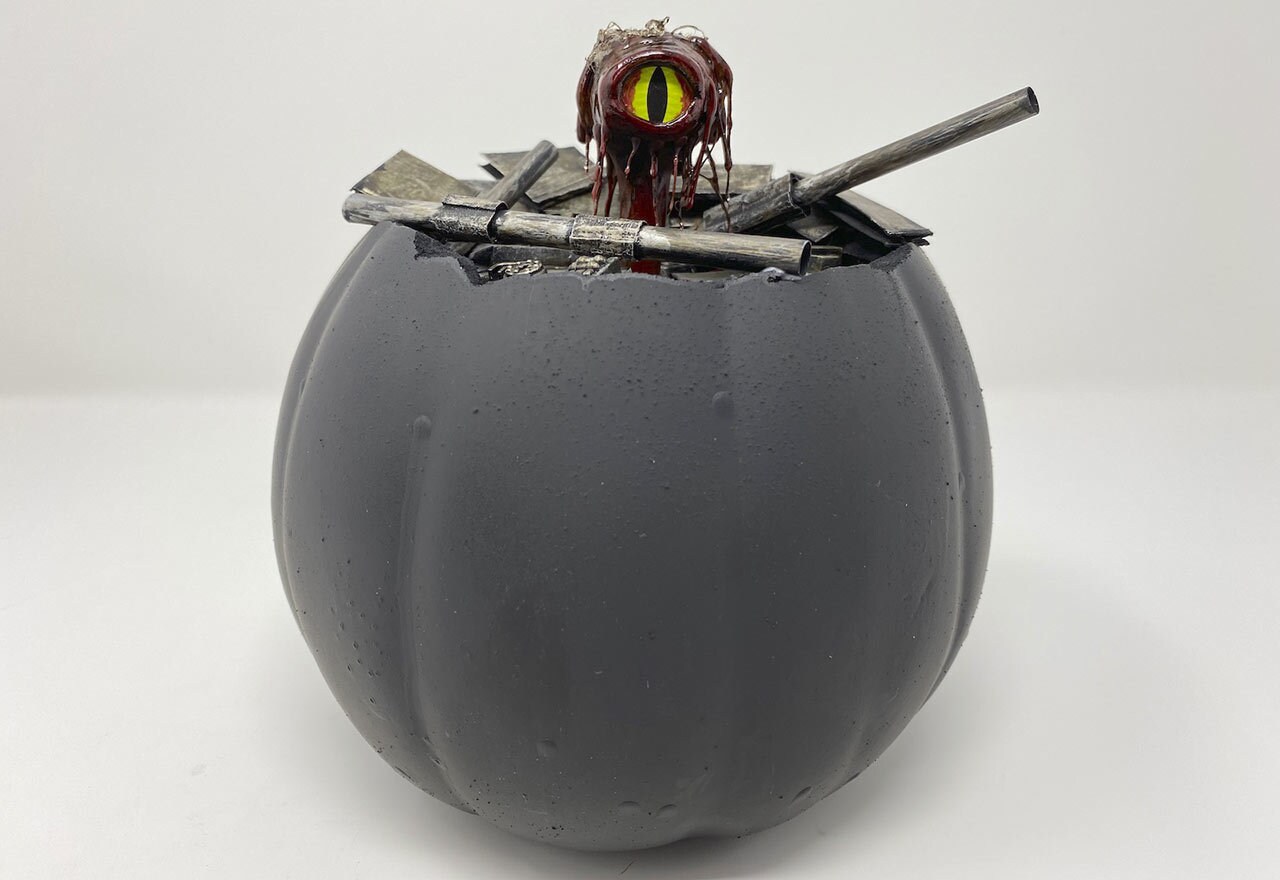
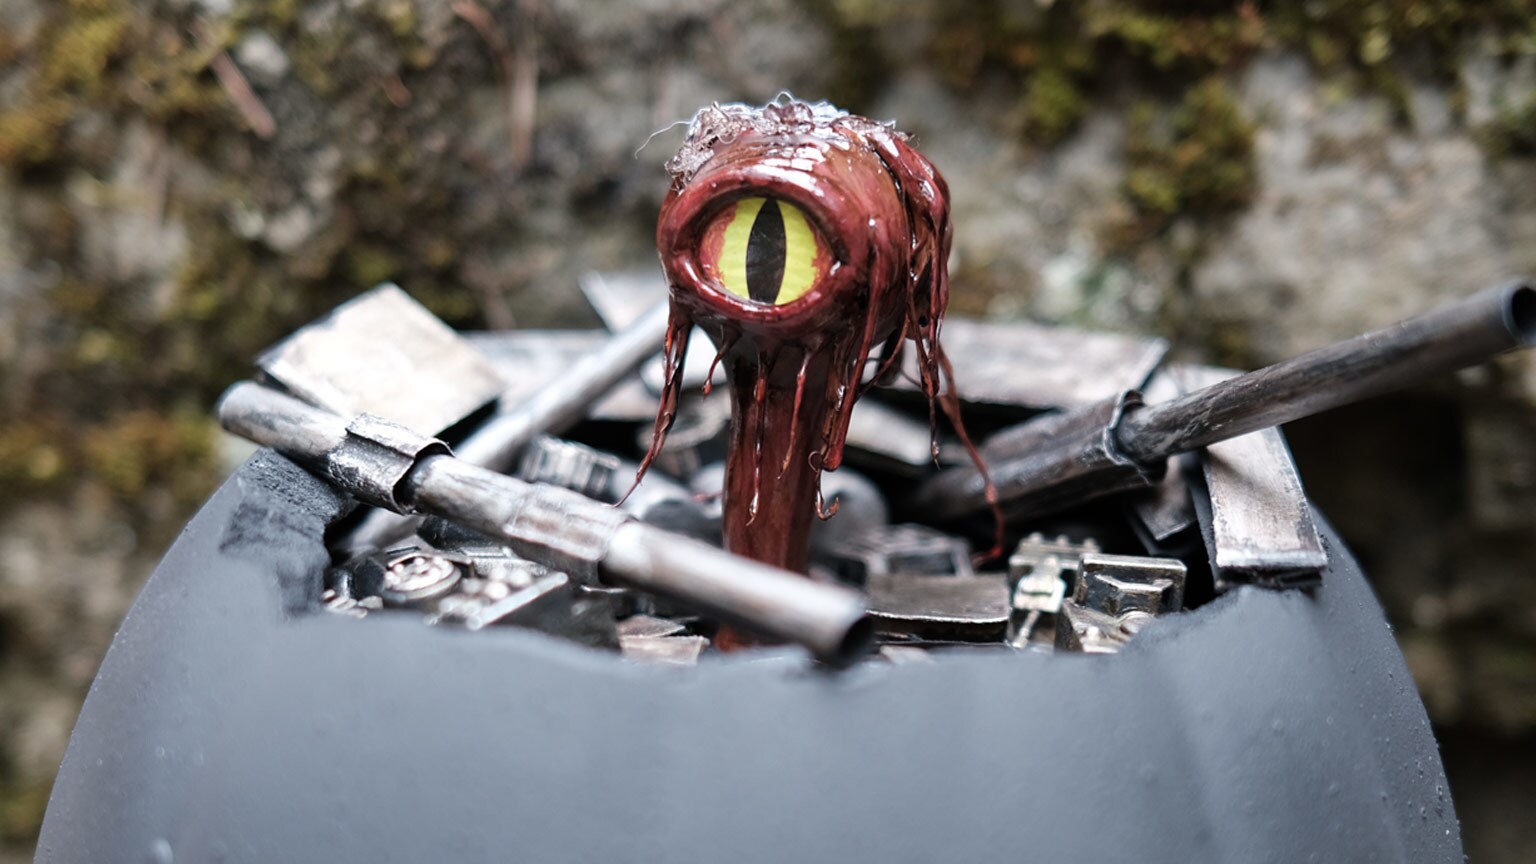
Turn a pumpkin into trash -- a trash compactor, that is! Grab your recyclables and old cardboard boxes and broken plastic toys. (New plastic toys from the dollar store also make great greeblies once you take them apart.) You’ll need it all to make a new Halloween home for a dianoga inside a craft pumpkin.

Dianoga

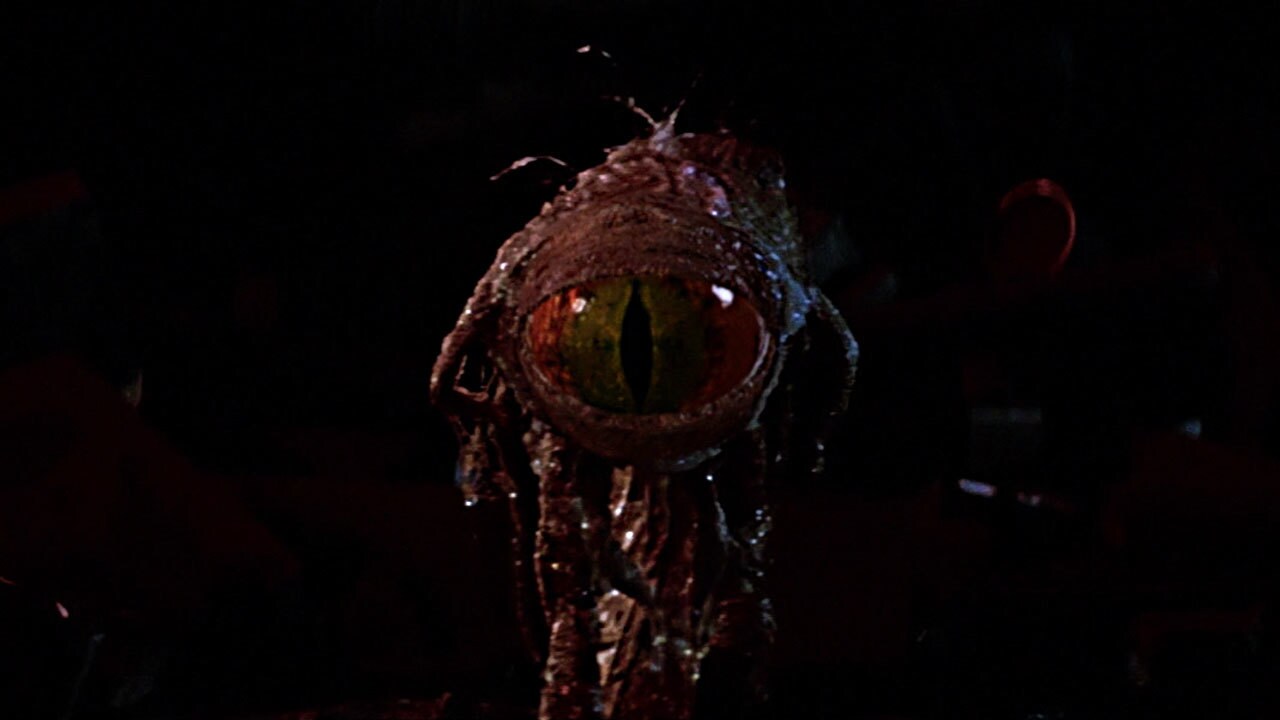
This creepy craft isn’t simple, but it oozes fun. Get ready to dive into making this one-of-kind Star Wars Halloween craft!

What You’ll Need

  • Small (6.5”) craft pumpkin
  • Pumpkin carving tool or knife
  • Black spray paint
  • Monster googly eye (or bright green paper and black marker)
  • Large wooden bead
  • Lightweight modeling clay
  • Floral foam
  • Black cardstock paper
  • Clear contact paper
  • Cardboard
  • Inexpensive or broken plastic toys
  • Straws
  • Black, brown, red, gold, and silver acrylic paint
  • Clear gloss varnish
  • Hot glue gun
  • Hobby clippers
  • Scissors
  • School glue
  • Pencil

Get Started!

Note: The activities in this article should only be done with adult supervision.

Dianoga-It-Yourself Pumpkin step 1

Step 1: Begin by carefully cutting off the top of the craft pumpkin around the stem.

Dianoga-It-Yourself Pumpkin step 2

Step 2: Spray paint the pumpkin black and let dry.

Step 3: Slide the wooden bead on the top of a straw and add glue to keep it in place.

Step 4: Remove the iris from the monster googly eye. If you don’t have a monster eye, you can cut a small circle of bright green paper and draw a slitted pupil on it.

Dianoga-It-Yourself Pumpkin step 5

Step 5: Glue the monster eye to the wooden bead and let dry.

Dianoga-It-Yourself Pumpkin step 6

Step 6: Roll a small snake of modeling clay and form an eyelid around the eye, pressing the clay against the wooden bead.

DianogaDianoga-It-Yourself Pumpkin step 7

Step 7: Fill in the rest of the head and body with modeling clay. (You can use the above image for reference.) Set the dianoga aside to dry.

Step 8: Glue a large piece of floral foam in the pumpkin. Make sure it’s no taller than about half an inch under the top edge of the pumpkin. Push the pencil into the center of the foam to make a hole.

Dianoga-It-Yourself Pumpkin step 9

Step 9: Cut a circle out of the black cardstock paper, approximately 6” in diameter. 

Step 10: Cover the black paper circle in clear contact paper.

Dianoga-It-Yourself Pumpkin step 11

Step 11: Glue the black paper circle on top of the floral foam. Cut or push a hole into the center of the circle for the dianoga to fit in later.

Step 12: Cut small squares and rectangles out of the cardboard. Cut two straws in half. Glue small strips of paper around one or two straws for additional details.

Dianoga-It-Yourself Pumpkin step 13

Step 13: Use the hobby clippers to cut small pieces of broken or cheap plastic toys. These will make more trash for the compactor.

Step 14: Paint the cardboard, straws, and plastic pieces with the black acrylic paint. Let dry.

Dianoga-It-Yourself Pumpkin step 15

Step 15: Paint the pieces with gold and silver paint to make them look like metal. Drybrush black and silver paint to highlight details. Mix black acrylic paint and water; paint it on the pieces to make them look used and old.

Step 16: Next, paint the dianoga with the black acrylic paint and let dry.

Dianoga-It-Yourself Pumpkin step 17

Step 17: Carefully give the dianoga tentacles with the hot glue. As you remove the thin strings sticking to the hot glue gun, save them! You’ll use these for the dianoga in a few steps.

Step 18: Paint the entire dianoga with the brown paint and let dry. 

Step 19: Paint the sclera of the dianoga’s eye with the red paint. Let dry.

Step 20: Dry brush red paint on the dianoga’s body for highlights. 

Dianoga-It-Yourself Pumpkin step 21

Step 21: Use the same black paint and water mix you made earlier to add more details to the dianoga and let dry.

Step 22: Glue the hot glue strings on the top of the dianoga’s head to make its hair.

Dianoga-It-Yourself Pumpkin step 23

Step 23: Gently push the dianoga into the hole in the center of the pumpkin. You may need to trim the straw to get it the right height.

Step 24: Paint the dianoga with the clear gloss varnish for a shiny wet look. Let any droplets of varnish form on the tentacles to complete the wet look. Let dry.

Step 25: Glue the trash pieces around the dianoga. 

Dianoga-It-Yourself Pumpkin

Your garbage masher pumpkin is complete! Display it on a table or shelf for a scary surprise this Halloween. 

Kelly Knox writes features and DIYs for StarWars.com. Her work can also be seen on DC Comics, IGN, and more. Follow her on Twitter at @kelly_knox to talk Star Wars, games, and crafts.

StarWars.com. All Star Wars, all the time.

Site tags: #StarWarsBlog, #Halloween, #ThisWeek

star wars crafts dianoga Halloween ThisWeek

Related Stories

{:title=>"Merchandise", :url=>"https://www.starwars.com/news/category/merchandise"} {:title=>"Collecting", :url=>"https://www.starwars.com/news/category/collecting"}

Star Wars Valentine's Day Gift Guide 2023

January 26, 2023

January 26, 2023

Jan 26

{:title=>"Star Wars Celebration", :url=>"https://www.starwars.com/news/category/star-wars-celebration"} {:title=>"Lucasfilm", :url=>"https://www.starwars.com/news/category/lucasfilm"}

Star Wars Celebration Europe 2023 Announces First Celebrity Guests

January 23, 2023

January 23, 2023

Jan 23

{:title=>"The Mandalorian", :url=>"https://www.starwars.com/news/category/the-mandalorian"} {:title=>"Disney+", :url=>"https://www.starwars.com/news/category/disney+"}

The Mandalorian Soars in New Season 3 Trailer and Key Art

January 17, 2023

January 17, 2023

Jan 17

{:title=>"The Bad Batch", :url=>"https://www.starwars.com/news/category/the-bad-batch"} {:title=>"Interviews", :url=>"https://www.starwars.com/news/category/interviews"}

Star Wars: The Bad Batch: Dee Bradley Baker on the Return of Commander Cody – Exclusive

January 13, 2023

January 13, 2023

Jan 13

{:title=>"The Bad Batch", :url=>"https://www.starwars.com/news/category/the-bad-batch"} {:title=>"Disney+", :url=>"https://www.starwars.com/news/category/disney+"}

“The Empire Is Everywhere”: The Creators of Star Wars: The Bad Batch on The Long Road Ahead in Season 2

January 4, 2023

January 4, 2023

Jan 4

{:title=>"The Bad Batch", :url=>"https://www.starwars.com/news/category/the-bad-batch"} {:title=>"Disney+", :url=>"https://www.starwars.com/news/category/disney+"}

Star Wars: The Bad Batch Season 2 Is Here!

January 4, 2023

January 4, 2023

Jan 4

{:title=>"Creativity", :url=>"https://www.starwars.com/news/category/creativity"}

This Upcycled Star Wars-Style Crate Makes a Great Galactic Gift Box

December 15, 2022

December 15, 2022

Dec 15

{:title=>"Andor", :url=>"https://www.starwars.com/news/category/andor"} {:title=>"Disney+", :url=>"https://www.starwars.com/news/category/disney+"}

Diego Luna Receives Golden Globe Nomination for Andor

December 12, 2022

December 12, 2022

Dec 12

More From Star Wars:
  • Facebook
  • Instagram
  • Twitter
  • Youtube
  • SWKids
  • Terms of Use
  • Additional Content Information
  • Privacy Policy
  • Children's Online Privacy Policy
  • Your California Privacy Rights
  • Star Wars at shopDisney
  • Star Wars Helpdesk
  • Interest-Based Ads
  • Do Not Sell My Personal Information

TM & © Lucasfilm Ltd. All Rights Reserved