Make your own costumes, including a wise pirate, a scoundrel in carbonite, and a legendary Jedi!
On this darkest of holidays, choose the light side of the Force and dress up as one of the good guys from Star Wars! Making your own costume can be fun, budget-friendly, and a great way to express your creativity. Here are three DIY Star Wars costume ideas that will make a statement, but won’t get you in debt with Jabba. These are your first steps…to making your Halloween Star Wars-spooktacular!
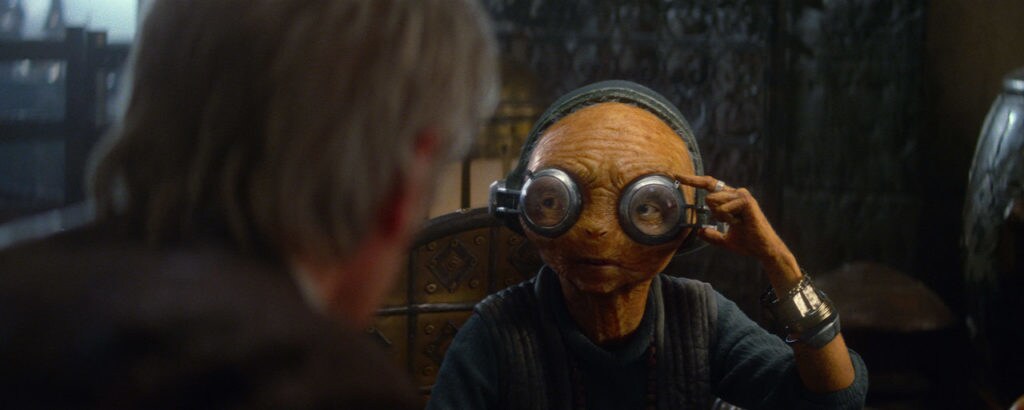
Maz Kanata (Star Wars: The Force Awakens)
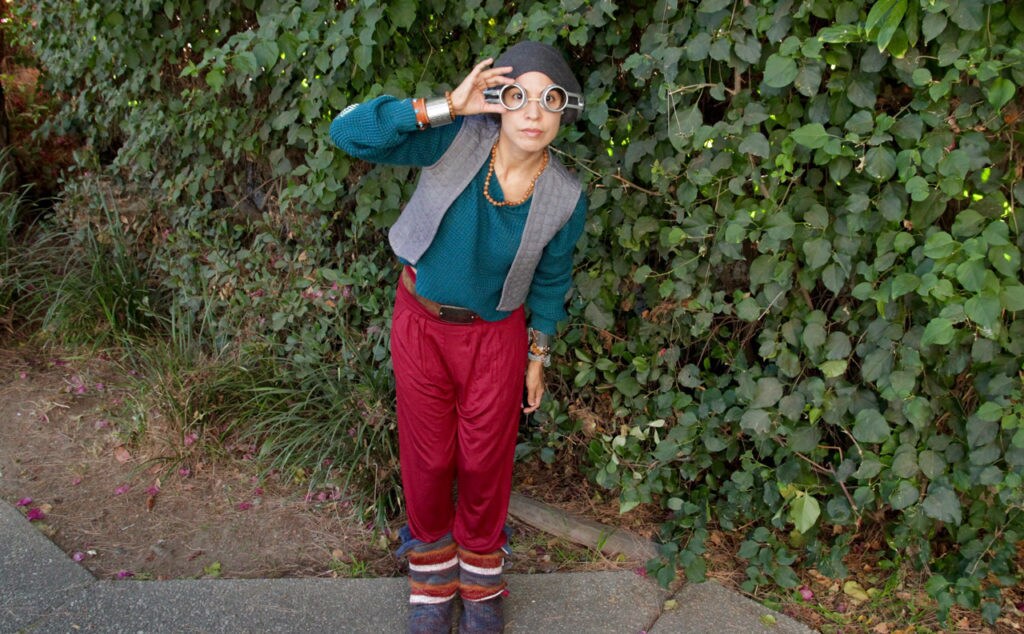
Many people dress up as pirates for Halloween, so why not dress up as the pirate queen of Takodana? This Maz Kanata costume is super-comfortable and practical for Fall weather. Maz also wears lots of jewelry, so pile on those accessories. And if you happen to have a Chewbacca backpack, wear it! After all, she likes that Wookiee.
What You'll Need:
- Maroon pants
- Gray vest
- Gray beanie
- Teal sweater
- Brown belt with silver buckle
- Welding goggles
- Over ear headphones
- Acrylic paint (silver and flesh color)
- Duct tape
- Pipe cleaners
- Colorful socks or slippers
- Beaded and silver jewelry
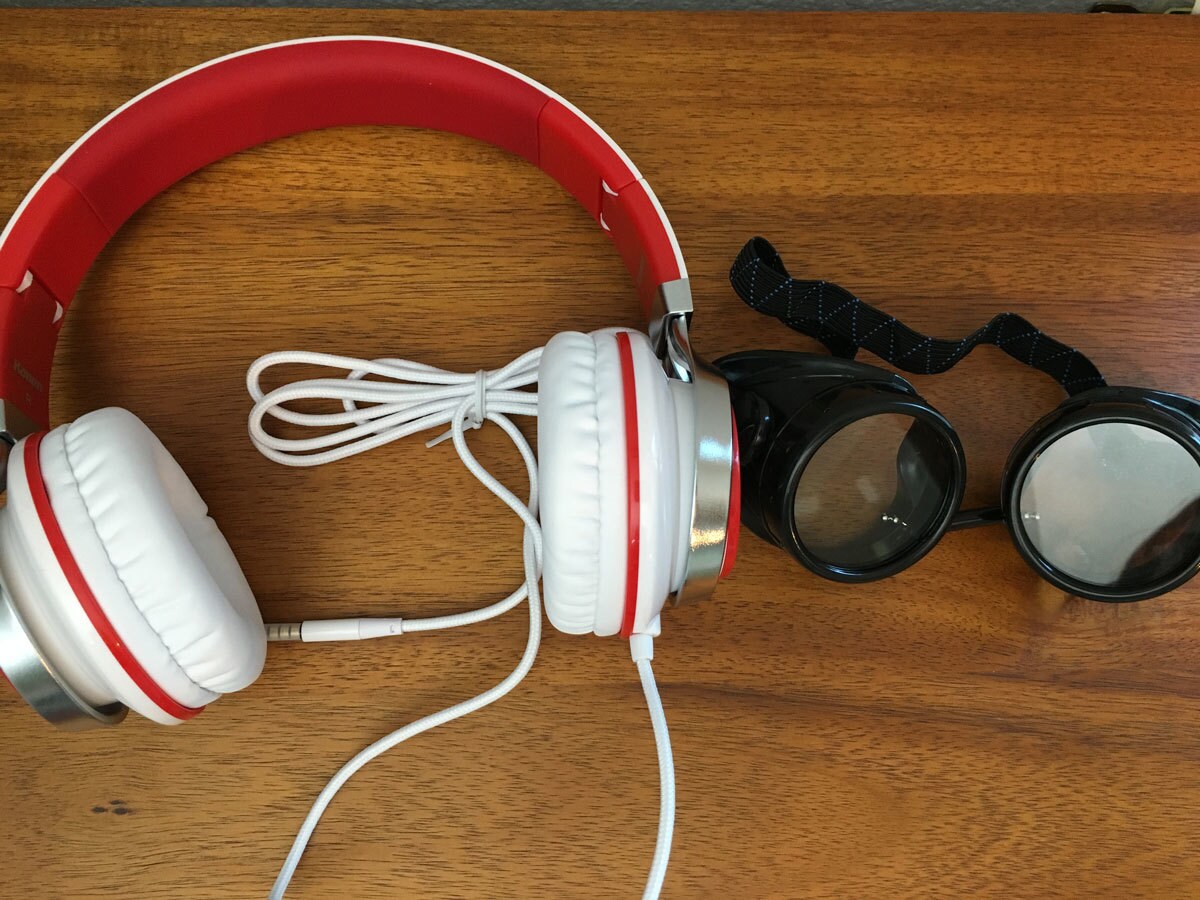
Maz Goggles and Headpiece Instructions:
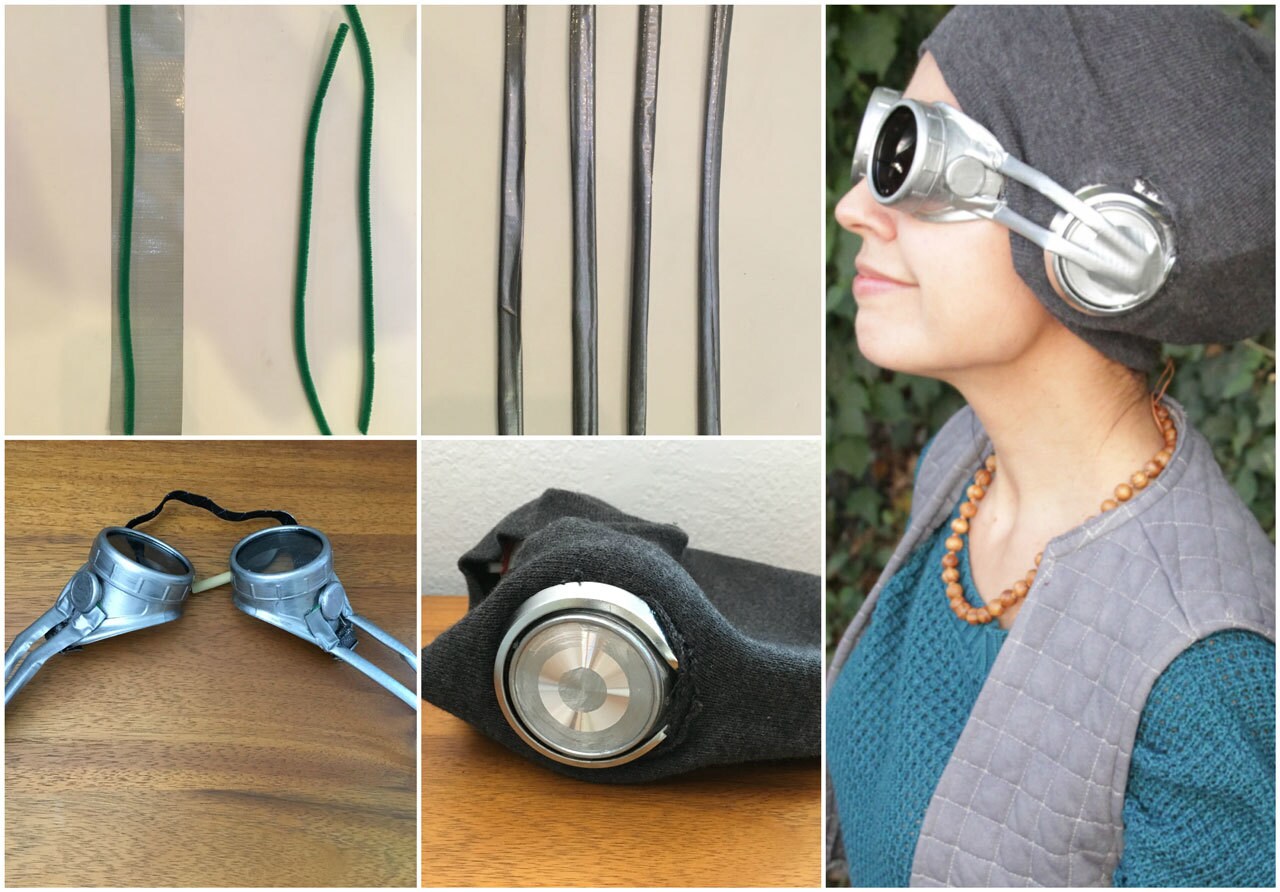
Step 1: Paint the rims of the goggles silver using acrylic paint. Paint the centerpiece a flesh color. (I found these black welding cup goggles on Amazon for a very reasonable price!)
Step 2: Cut a hole on the right and left sides of the beanie. The hole should be big enough to fit over the sides of the headphones.
Step 3: Wrap duct tape around 4 pipe cleaners. Put on the goggles and headphones, then trim the length of the pipe cleaners according to where it matches up with the headphones. Hot glue the wrapped pipe cleaners to the sides of the goggles.
Step 4: When wearing the costume, use duct tape to secure the open sides of the pipe cleaners to the sides of headphones. I cut out the duct tape in circles so it matched the shape of the headphones.
Maz Outfit Tips:
For Maz’s ensemble, head to your local thrift store to see what treasures you can unearth. The vest I’m wearing was originally a cream-colored jacket. I dyed it gray, cut off the sleeves, and hemmed it to make it shorter. Maz’s pants are baggy so harem pants offer a similar silhouette. Maz knits her own clothes and socks but I used Muk Luks slippers and a teal knitted sweater that I found at a garage sale.
You just need your boyfriend Chewbacca, and you're ready for Halloween!
Jedi Master Luke (Star Wars: The Force Awakens, Star Wars: The Last Jedi)
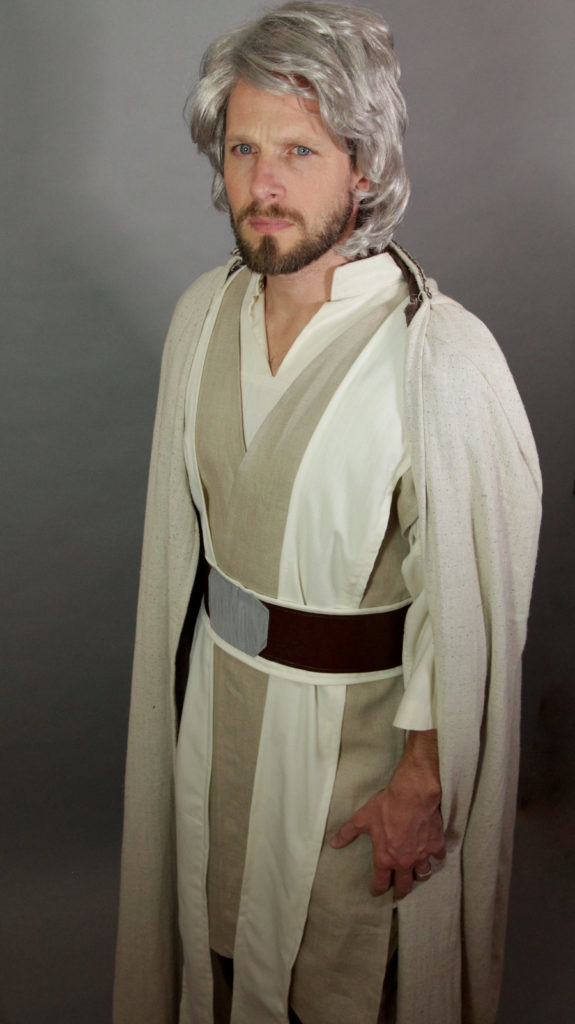
This year your child has decided to dress up as Rey. So who better to show her the way of trick-or-treating than Jedi Master Luke? This look is based on one of Luke Skywalker’s outfits in The Last Jedi. While this costume requires some sewing, if you’ve got a Jedi robe from past Halloweens, you’re halfway there!
What You'll Need:
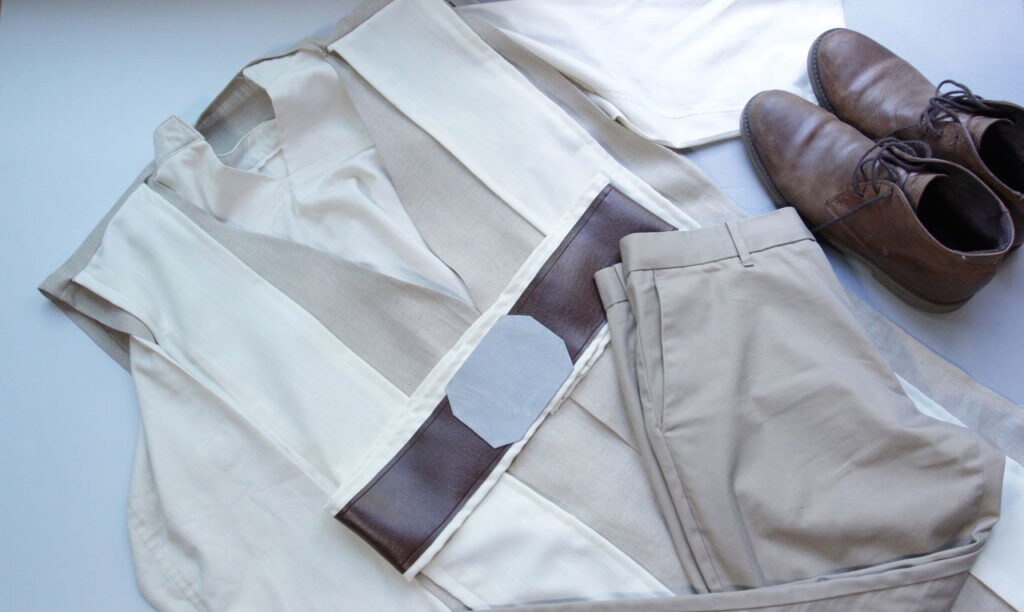
- White/cream tunic or banded collar shirt
- Cream linen fabric for vest
- Tan linen fabric for tabard
- Jedi robe or brown linen fabric
- Brown pleather fabric
- Tan pants
- Tan boots
- Craft foam (gray)
- Velcro
- Gray wig and beard
Luke Tabard Instructions:
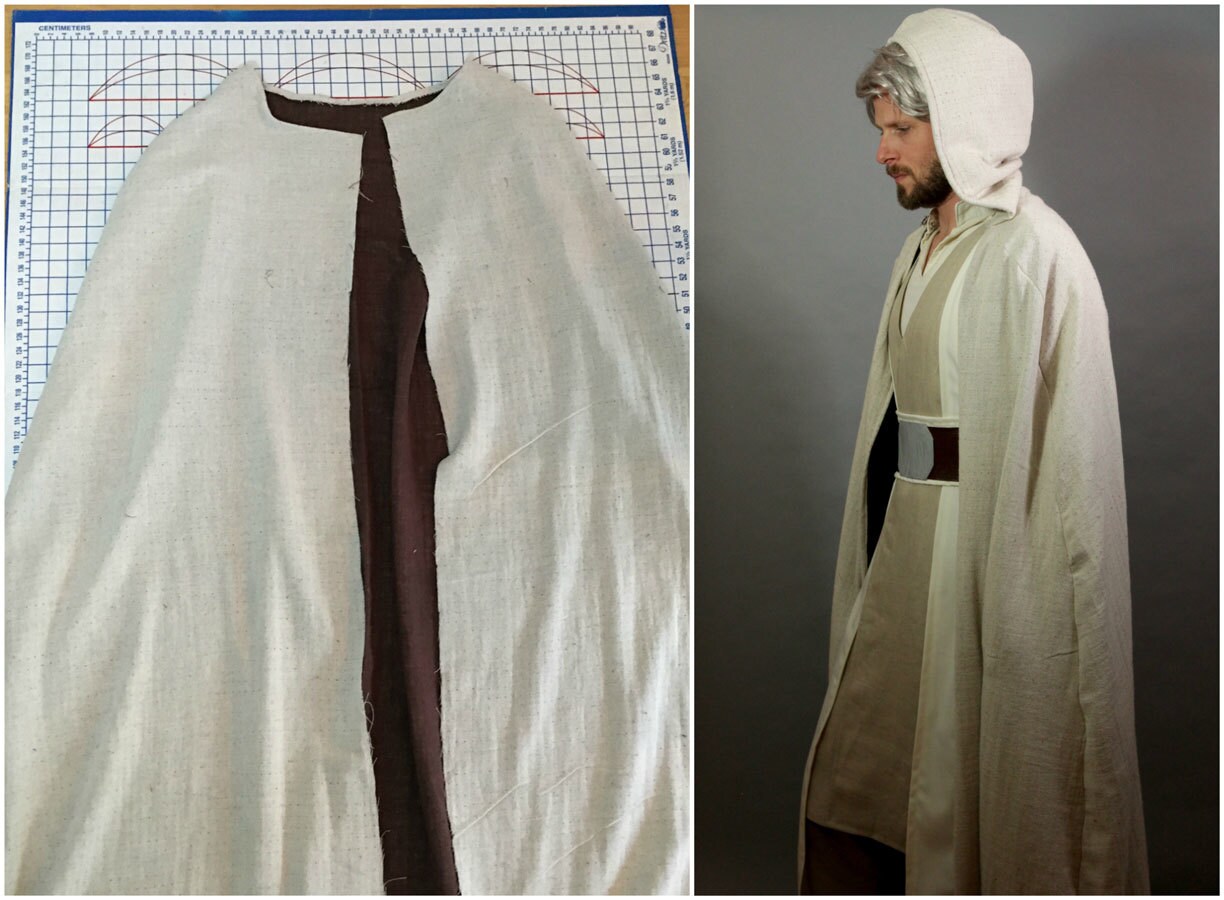
Step 1: Measure the width of your shoulders, from one end to the other. Then measure from your shoulders down to a few inches above your ankles. Use those measurements to cut 2 rectangles from the tan linen fabric. Set one of the rectangles aside. This will be the back of your tabard.
Step 2: For the front, cut the other rectangle either straight down the middle or with a v-shape at the top (see photo). Sew the 2 front pieces to the back piece at the top of the shoulders. Leave the sides, front, and bottom of the tabard unattached. Finish the edges if you’d like.
Step 3: Measure from your shoulder to your ankles. Use that measurement to cut 2 rectangular strips. These strips should be half the width of one of the front tabard pieces.
Step 4: Sew the cream strips to the top of the shoulders of the tabard.
Luke Belt Instructions:
Step 1: Measure your waist. Cut a rectangular shape the length of your waist (plus a few inches for seam allowance) and 3.5” wide out of the brown pleather fabric. Cut a strip of the cream linen fabric (the same one used for the tabard) 5” wide and the length of your waist plus a few inches.
Step 2: Pin the pleather fabric to the cream fabric and topstitch the two together.
Step 3: Make a belt buckle detail out of craft foam. Attach with hot glue to the belt.
Step 4: Add Velcro to the back of the belt.
Luke Cape Tips:
If you already have a Jedi robe from previous Halloweens, reuse it for this costume! If not, you can make a cape out of linen fabric. Depending on the photo or toy, the color of Luke’s cape seems to vary from an oatmeal color to tan to gray. For my cape, I found a brown linen fabric and used the “wrong side” that was a lighter shade. If you’ve never made a cape before, most fabric stores carry patterns for capes/cloaks. There are also many great free patterns online, which is what I used to make this hooded cape.
You are now ready to exile yourself to an island this Halloween.
Han Solo in Carbonite (Star Wars: The Empire Strikes Back, Star Wars: Return of the Jedi)
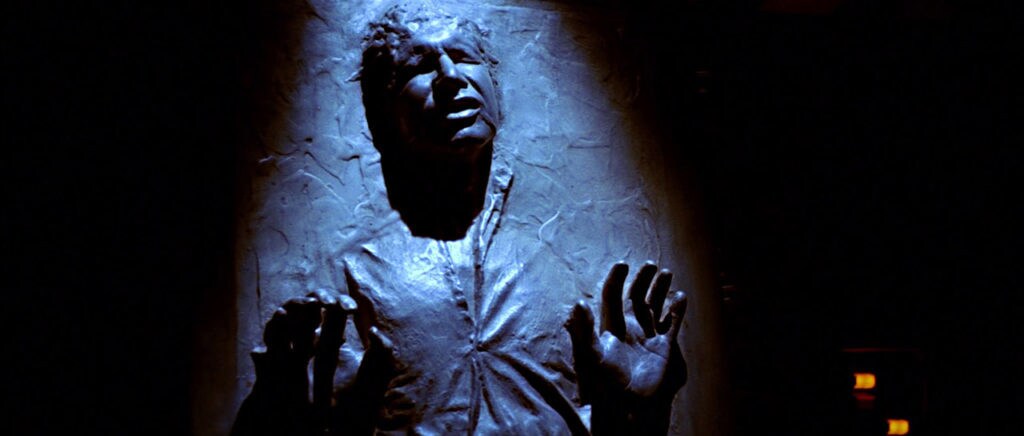
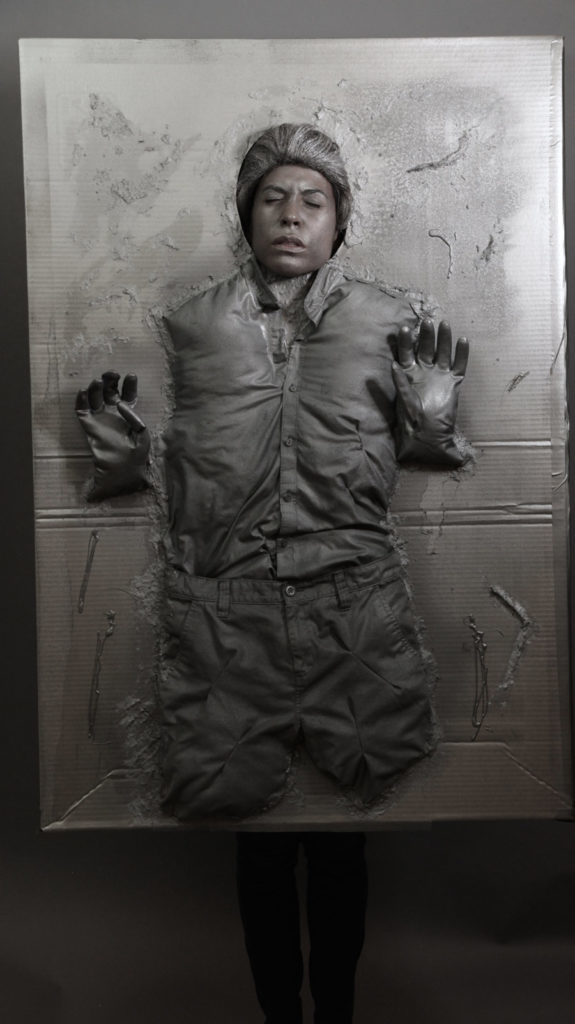
You’ve dressed up as Han Solo before, but how about Han Solo in carbonite? This costume is an easy-to-make and simplified version of the one onscreen. The back of the costume is open so you’ll have plenty of legroom to do the Monster Mash. But don’t worry, even if it’s freezing outside, the box should keep you quite well protected.
What You'll Need:
- Large box
- Button down shirt
- Khaki Pants
- Rubber gloves
- Wire hangers
- Polyester stuffing
- Instant paper mache product
- Spray paint (dark silver, light silver)
- Snap blade utility knife
- Gray wig (optional)
- Silver face paint (optional)
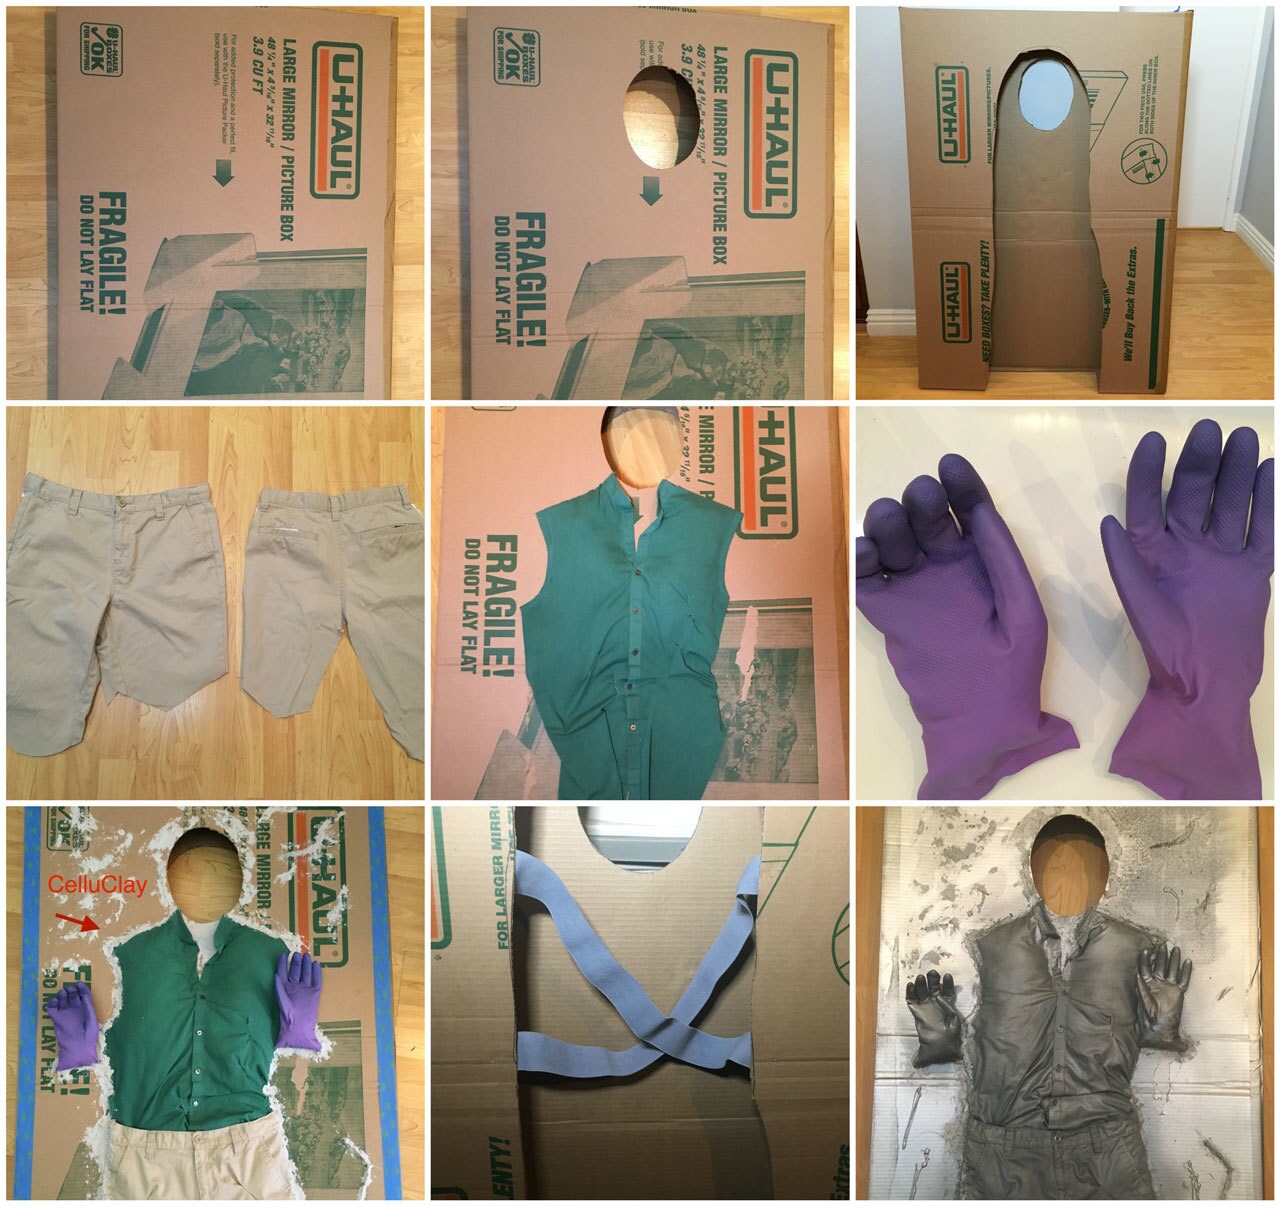
Step 1: First, assemble the box and tape the open sides closed. I chose a large mirror/picture box because it’s lighter and allows easier movement. It also means the costume will be shorter than the onscreen version. If you want your costume to be more screen-accurate, use a wardrobe box instead.
Step 2: Cut a hole in the back of the box. The hole should be about as wide as your shoulders.
Step 3: Measure the length and width of your face. Use excess cardboard to create a stencil of your face shape. On the inside of the box, measure and mark 5 inches down from the top in the center. Place the stencil where you marked, then draw around the stencil. Cut out the face shape hole.
Step 4: For the shirt, remove the top buttons on the shirt. Cut off the collar so you are left with a banded collar. Cut off the back of the shirt. Leave at least an inch and a half of the back fabric so you have a little bit to tuck under. Position the shirt on the box and fold the edges under. Glue the shirt to the box a few sections at a time, stuffing the shirt along the way.
Step 5: For the pants, cut them in half and place only the front of the pants onto the box. Cut the pants legs according to length of your box. If you’re using a large mirror box (like mine), the pants legs will be much shorter than if you’re using a wardrobe box. Glue the pants to the box a few sections at a time, stuffing the pants legs along the way.
Step 6: For the hands, cut wire hangers to the appropriate length of the dish gloves. Place the hangers inside the fingers of the gloves then, stuff the hands with polyester stuffing. Bend the fingers and then seal the gloves closed with hot glue. Position them onto the box and attach the wrists and back of the hands with hot glue.
Step 7: Use painter’s tape to create a border around the box.
Step 8: To give Han’s body some texture, smear an instant paper mache around Han’s body and onto the box. Get messy with it!
Step 9: Use the darker silver to spray paint Han’s body. (I used a “hammered silver” color.) Use the lighter silver to spray paint the rest of the box. Let it dry, then spray paint a second coat. Once that coat is dry, remove the tape and use the lighter silver to spray paint the border.
Step 10: For the full effect, apply silver face paint to your face and ears. Wear a gray wig or use metallic silver hairspray on any short-haired wig.
You're done -- and you'll be Jabba's favorite Halloween decoration!
So grab those scissors and hot glue because there’s still plenty of time left to turn yourself into a pirate queen, Jedi Master, or frozen smuggler this Halloween. The craft. It’s calling to you. Just let it in.
Jennifer Landa is an actress, host, and crafter. Follow her on Twitter @JenniferLanda and for more Star Wars DIYs, visit her YouTube channel.


