

Now let’s craft this thing and go home.
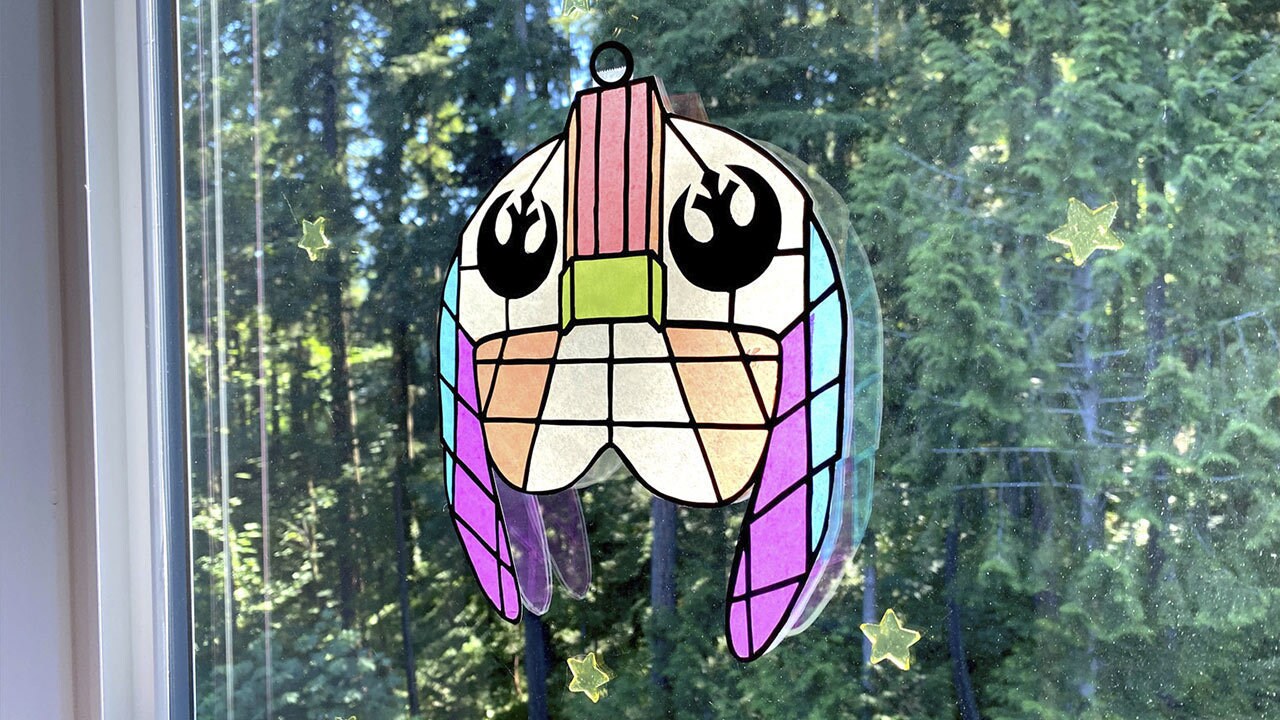
Ah, the cheerful summer sunshine is as bright as an exploding Death Star! (Both of them.) Capture a little bit of that energy and joy in a DIY that mimics a stained glass suncatcher. Anyone who spies it hanging in your window will know that a creative Star Wars fan lives inside.

With some patience and a steady hand, you’ll turn colorful tissue paper and our X-wing helmet template into a sunny homage to your favorite pilot.
What You’ll Need
- X-wing helmet template
- White cardstock paper
- Tissue paper, various colors
- Black marker
- Craft knife
- Scissors
- Glue
- Pencil
Get Started!
Note: This DIY calls for a sharp craft knife and is not suitable for children.
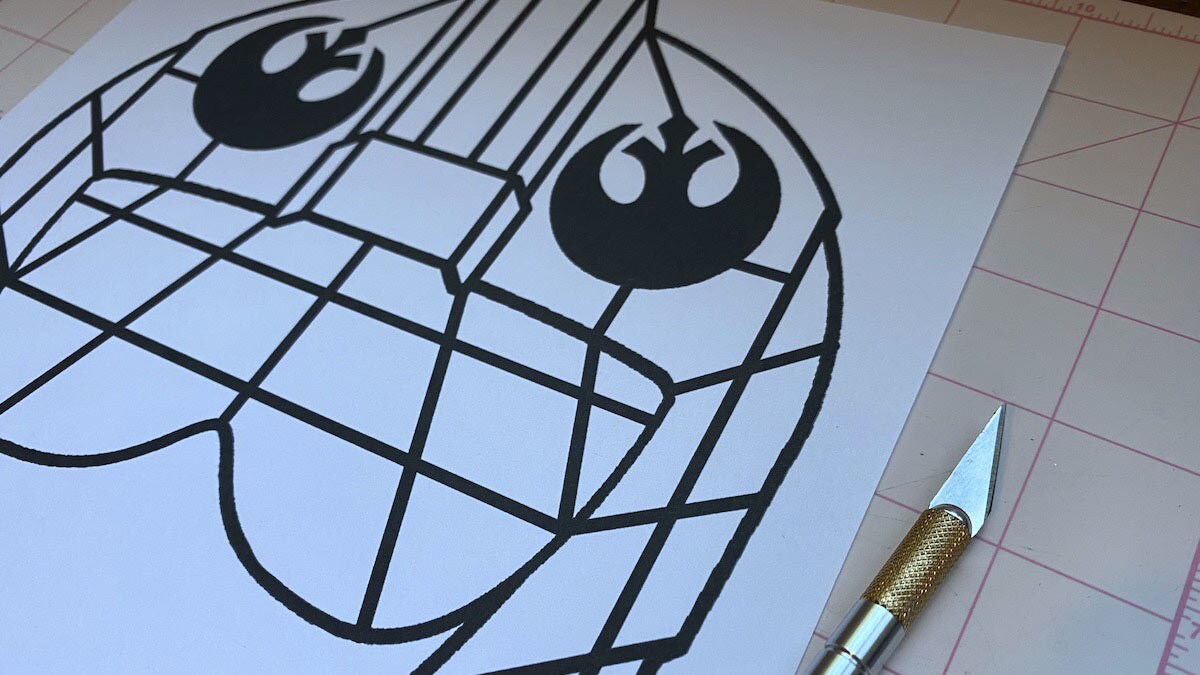
Step 1: Print the X-wing helmet template on the white cardstock paper.
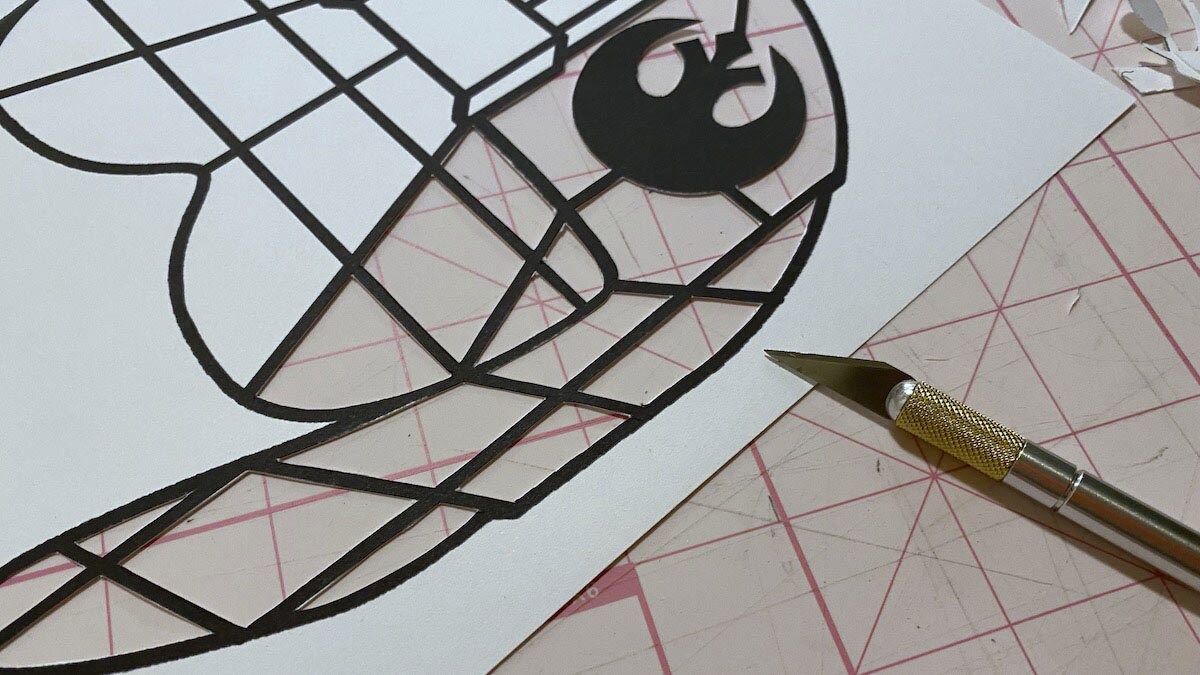
Step 2: Begin carefully cutting out the white spaces between the black lines with the craft knife. Make sure you have a cutting mat or other protection for the table underneath the paper.

Step 3: Once all of the white space has been cut out, use a black marker to fill in any uneven edges.
Optional: Flip over the helmet to the unprinted side and use the marker to make those lines black as well.
Step 4: Cut out the helmet along the outside line with scissors.
Step 5: Choose your colors of tissue paper. You can make the helmet screen accurate with red, yellow, and white, or create a rainbow effect with several different colors.
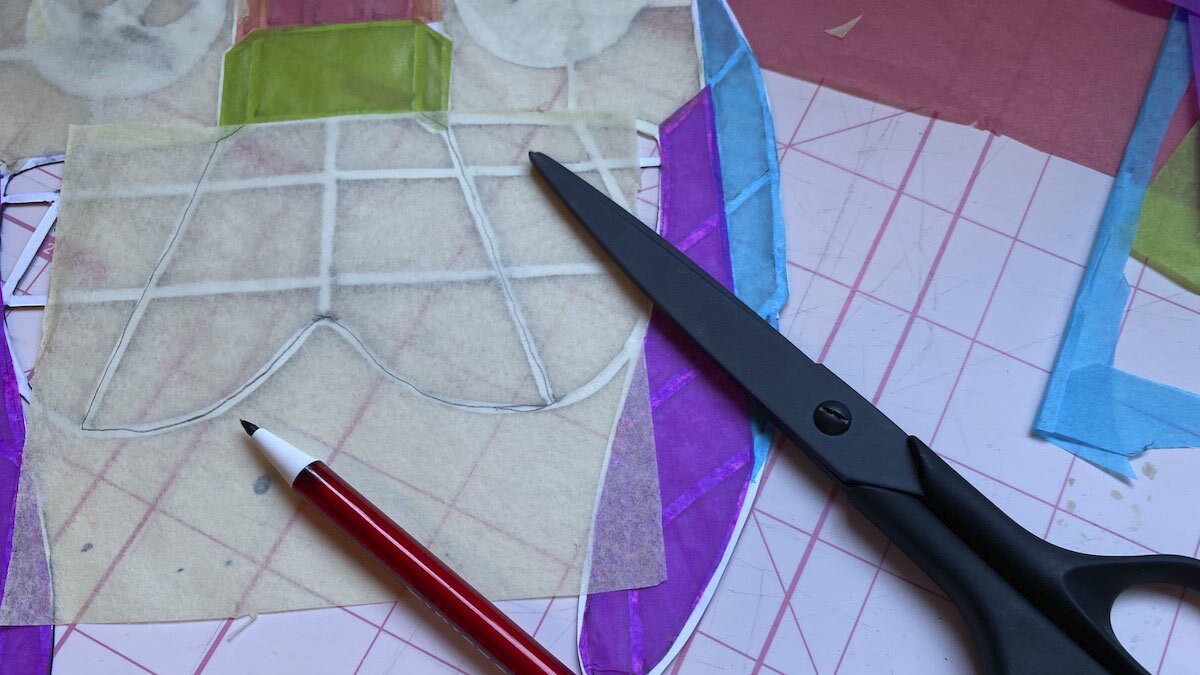
Step 6: Lay the tissue paper on top of the suncatcher where you’d like that color. Trace the black lines underneath as a guide to accurately measure the shape.
Step 7: Cut out the tissue paper along the traced line.
Step 8: Squeeze a thin line of glue along the black line on the helmet and gently press the tissue paper in place.
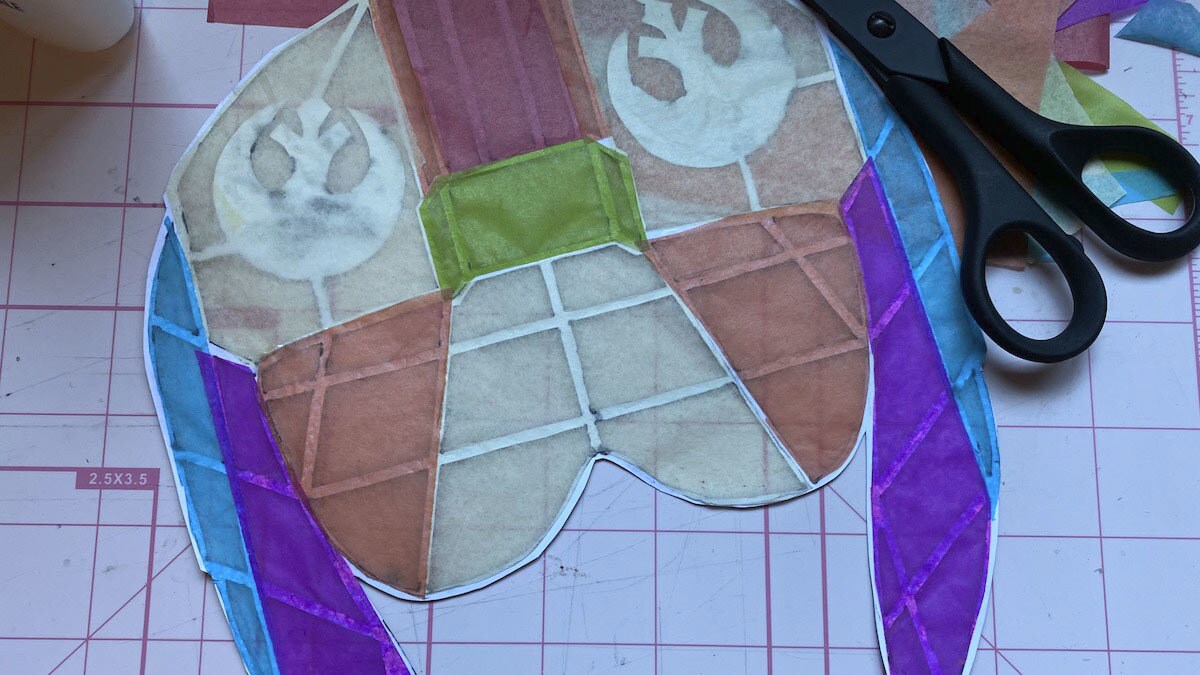
Step 9: Continue tracing, cutting, and gluing until every white space except the top circle is covered.
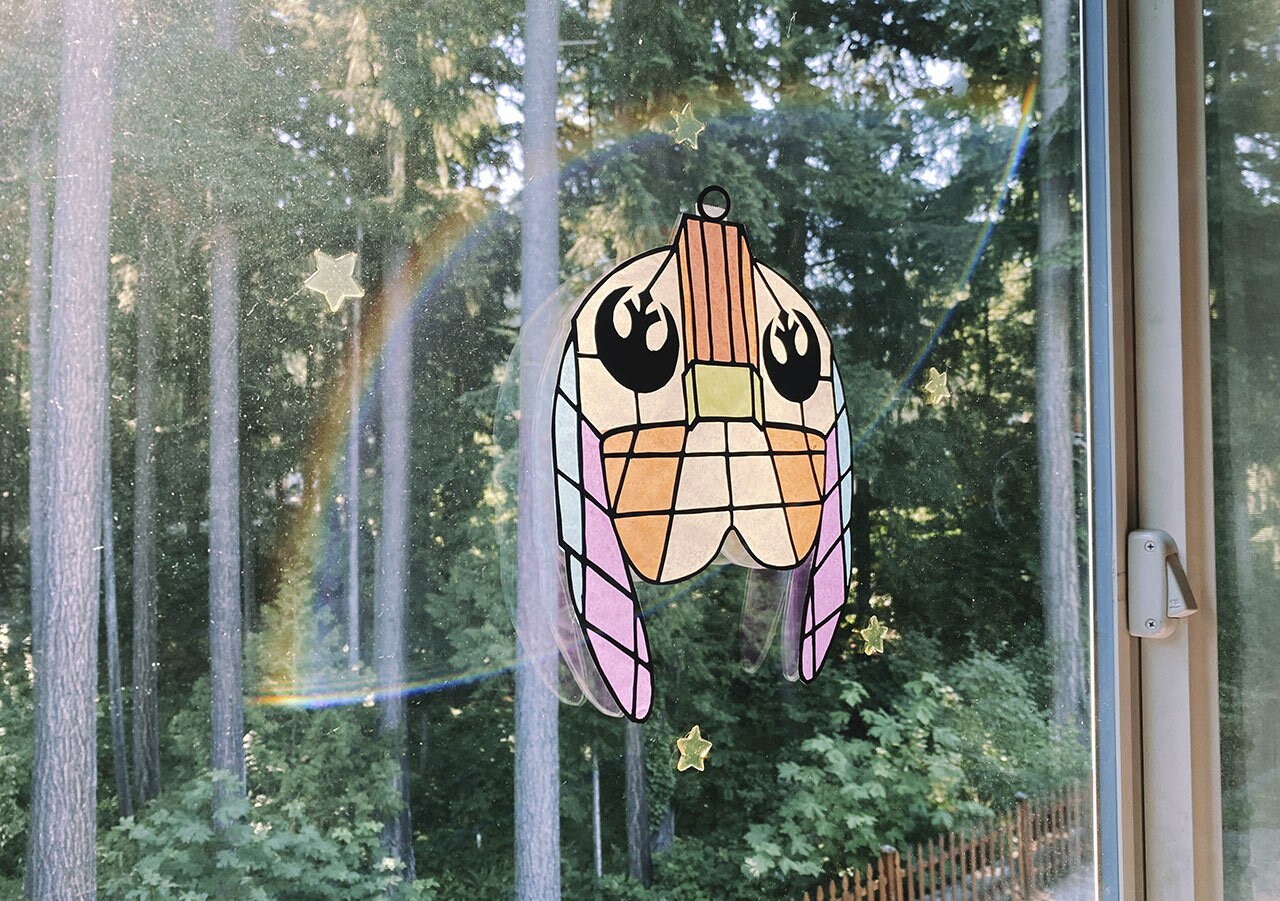
Step 10: Let all the glue dry. Your suncatcher is complete!
Tape the helmet or hang it from a suction cup hook on a window for a colorful reminder of the galaxy far, far away.
